Cleaner Air, and a Place for my Planer
Cleaner air in my shop is something that has been on my mind for a long time, but it was also something I had been putting off. A while ago Jay Bates built an air cleaner cart and documented the process in a post and a YouTube video. He did a nice job with a simple design, so I borrowed heavily from it and built my own.
Design Modifications
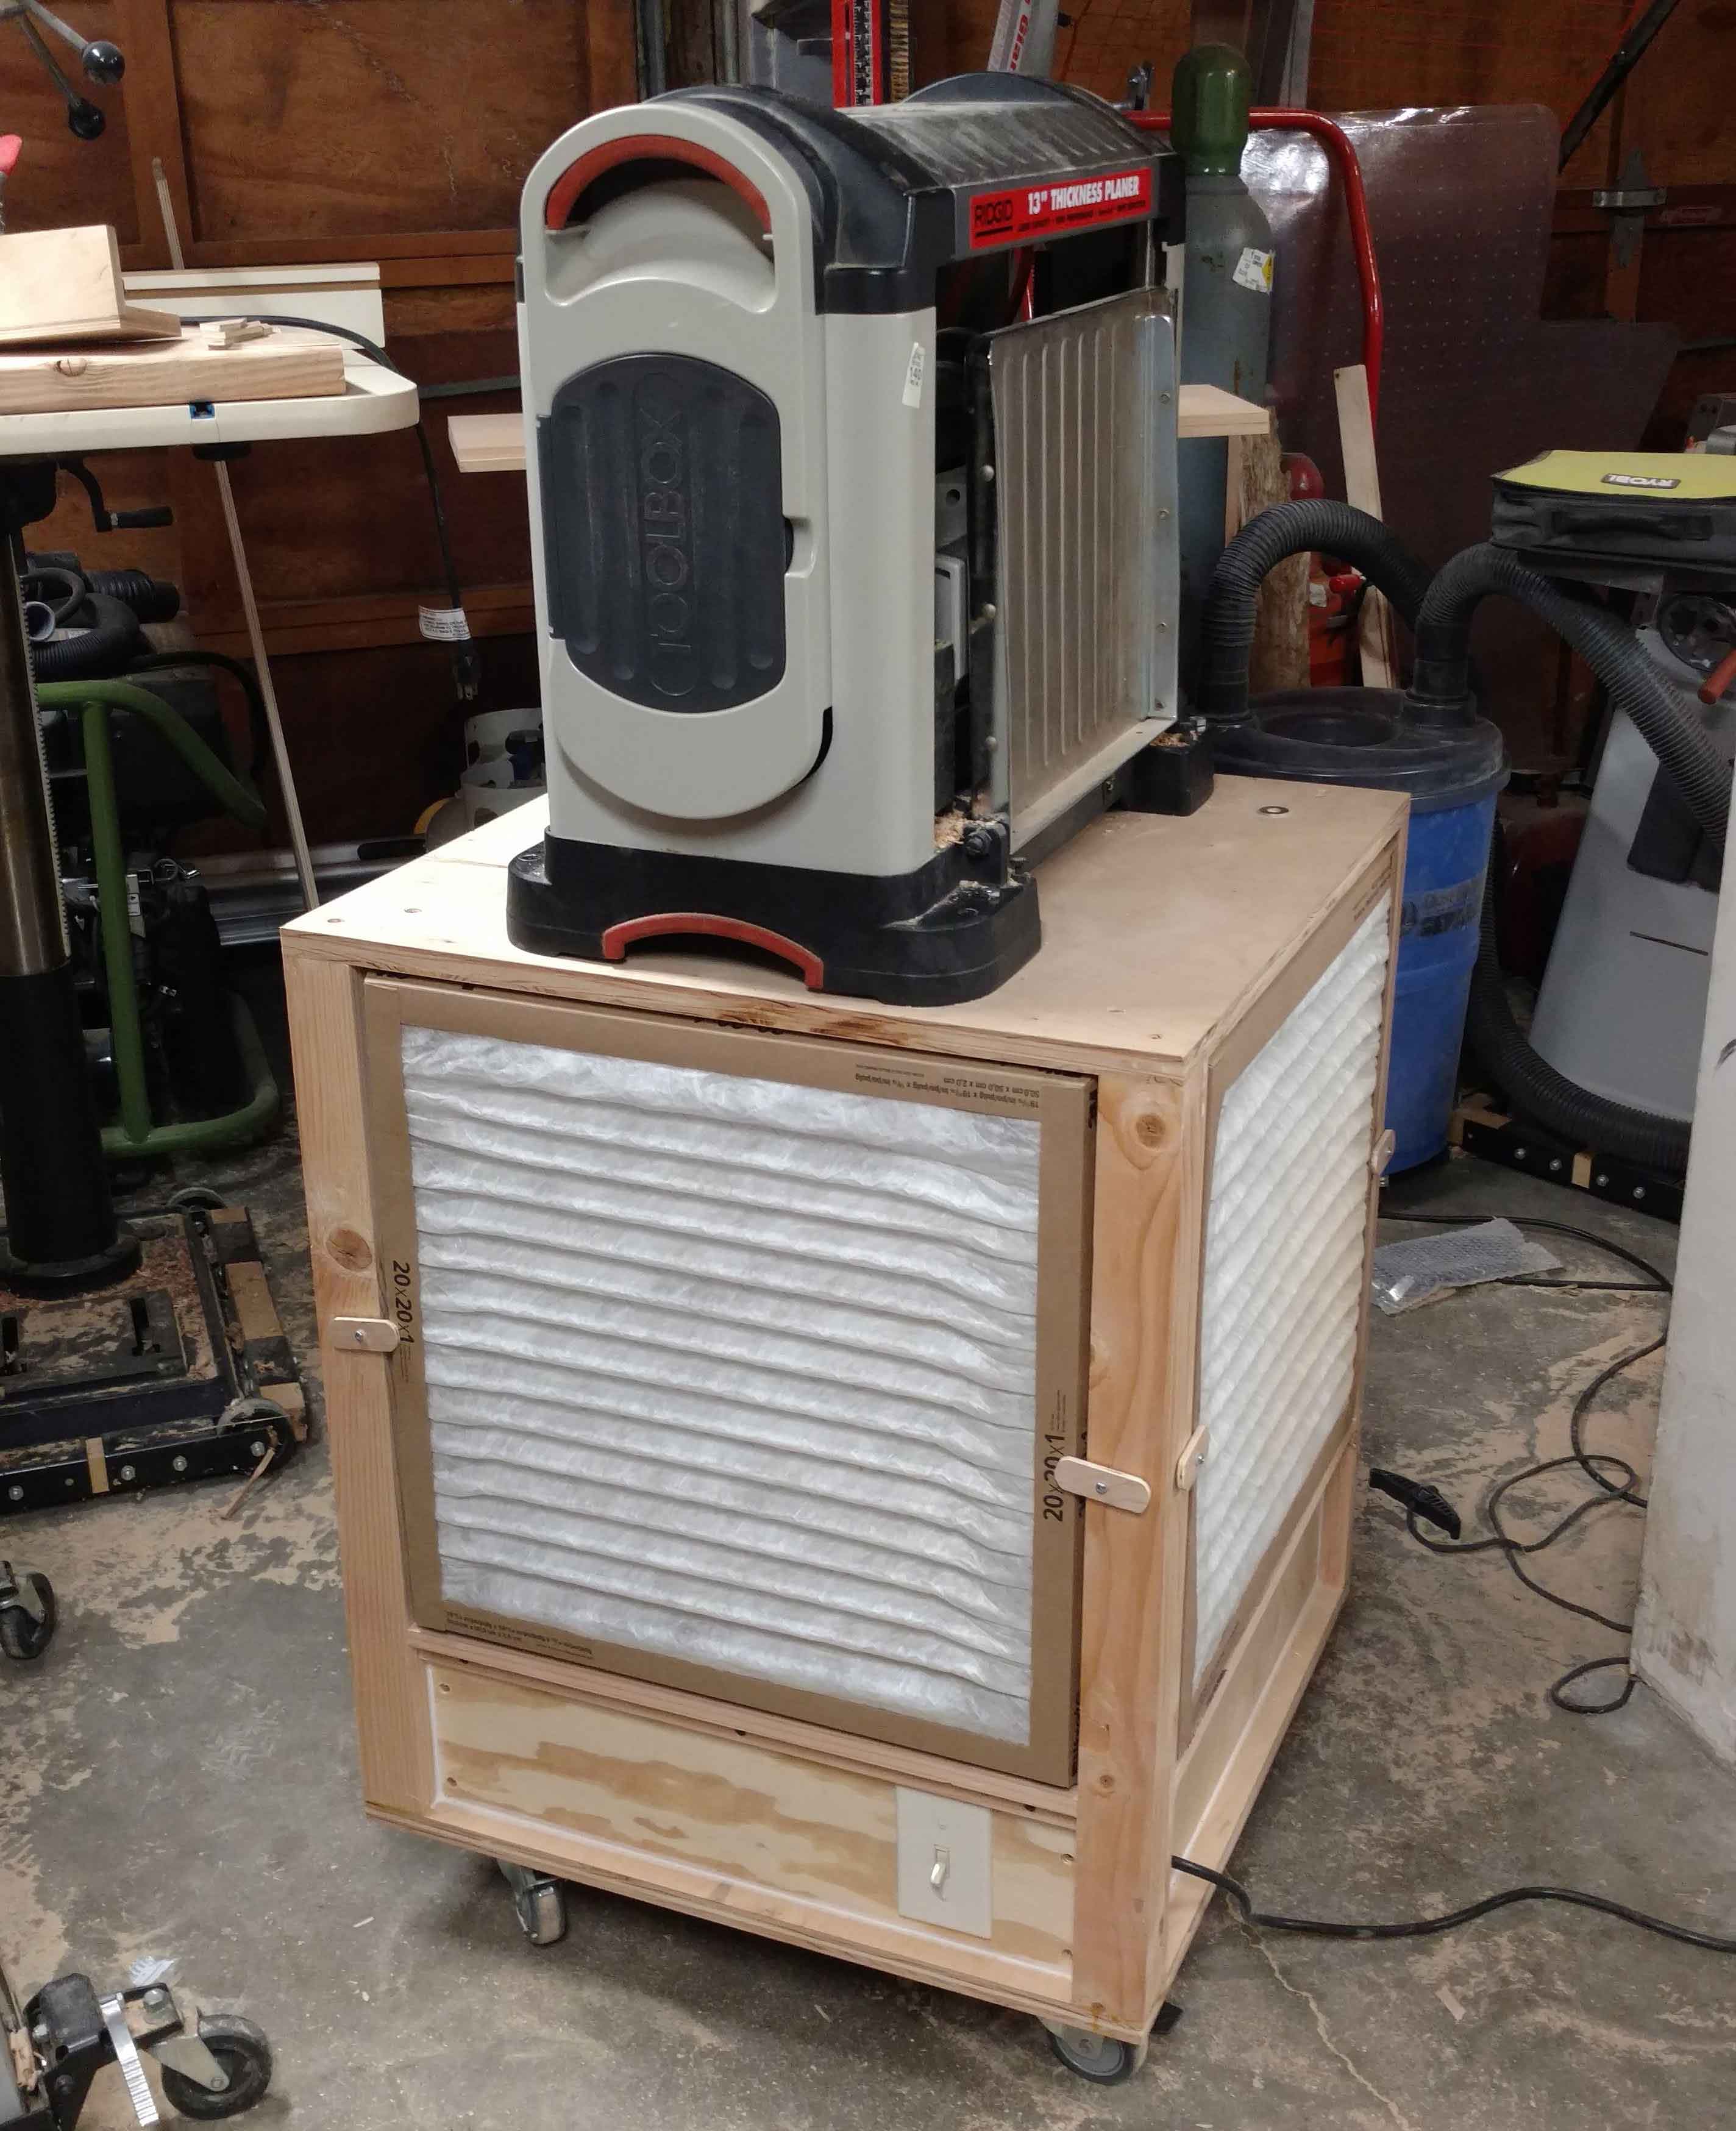
While Jay’s design was very good, I decided to make a few changes based on my own shop and some of the comments on his build. The first was the height of the cart. Like Jay, I planned on putting my planer on top of the cart, mainly because it was just about the only machine in my shop that wasn’t already on wheels. I decided to plan it out so the infeed and outfeed of the planer were the same height as my tablesaw, which I have an outfeed table of the same height planned as well.
Another change was the depth of the rabbets to accept the filters. Since good quality filters are quite expensive, I decided to double stack them, with the fine filters inside and $2-3 outer filters catching all but the finest dust. I figure this will help to increase the life of the filters.
I also made a few little detail changes. Instead of taping the butt seams closed, I used caulk. I moved the placement of the switch and mounted it flush to the cart. I actually thought putting the switch near the floor was kind of a bad idea, but I found that it is perfect for flipping with my toe.
Obtaining Materials
All of the wood that was used was already in the shop, which was convenient. I also already had the casters, which were gleaned from retail fixtures that were broken down years ago and were being thrown out. This left buying some assembly hardware for mounting the casters and planer, the electrical parts, and the blower itself.
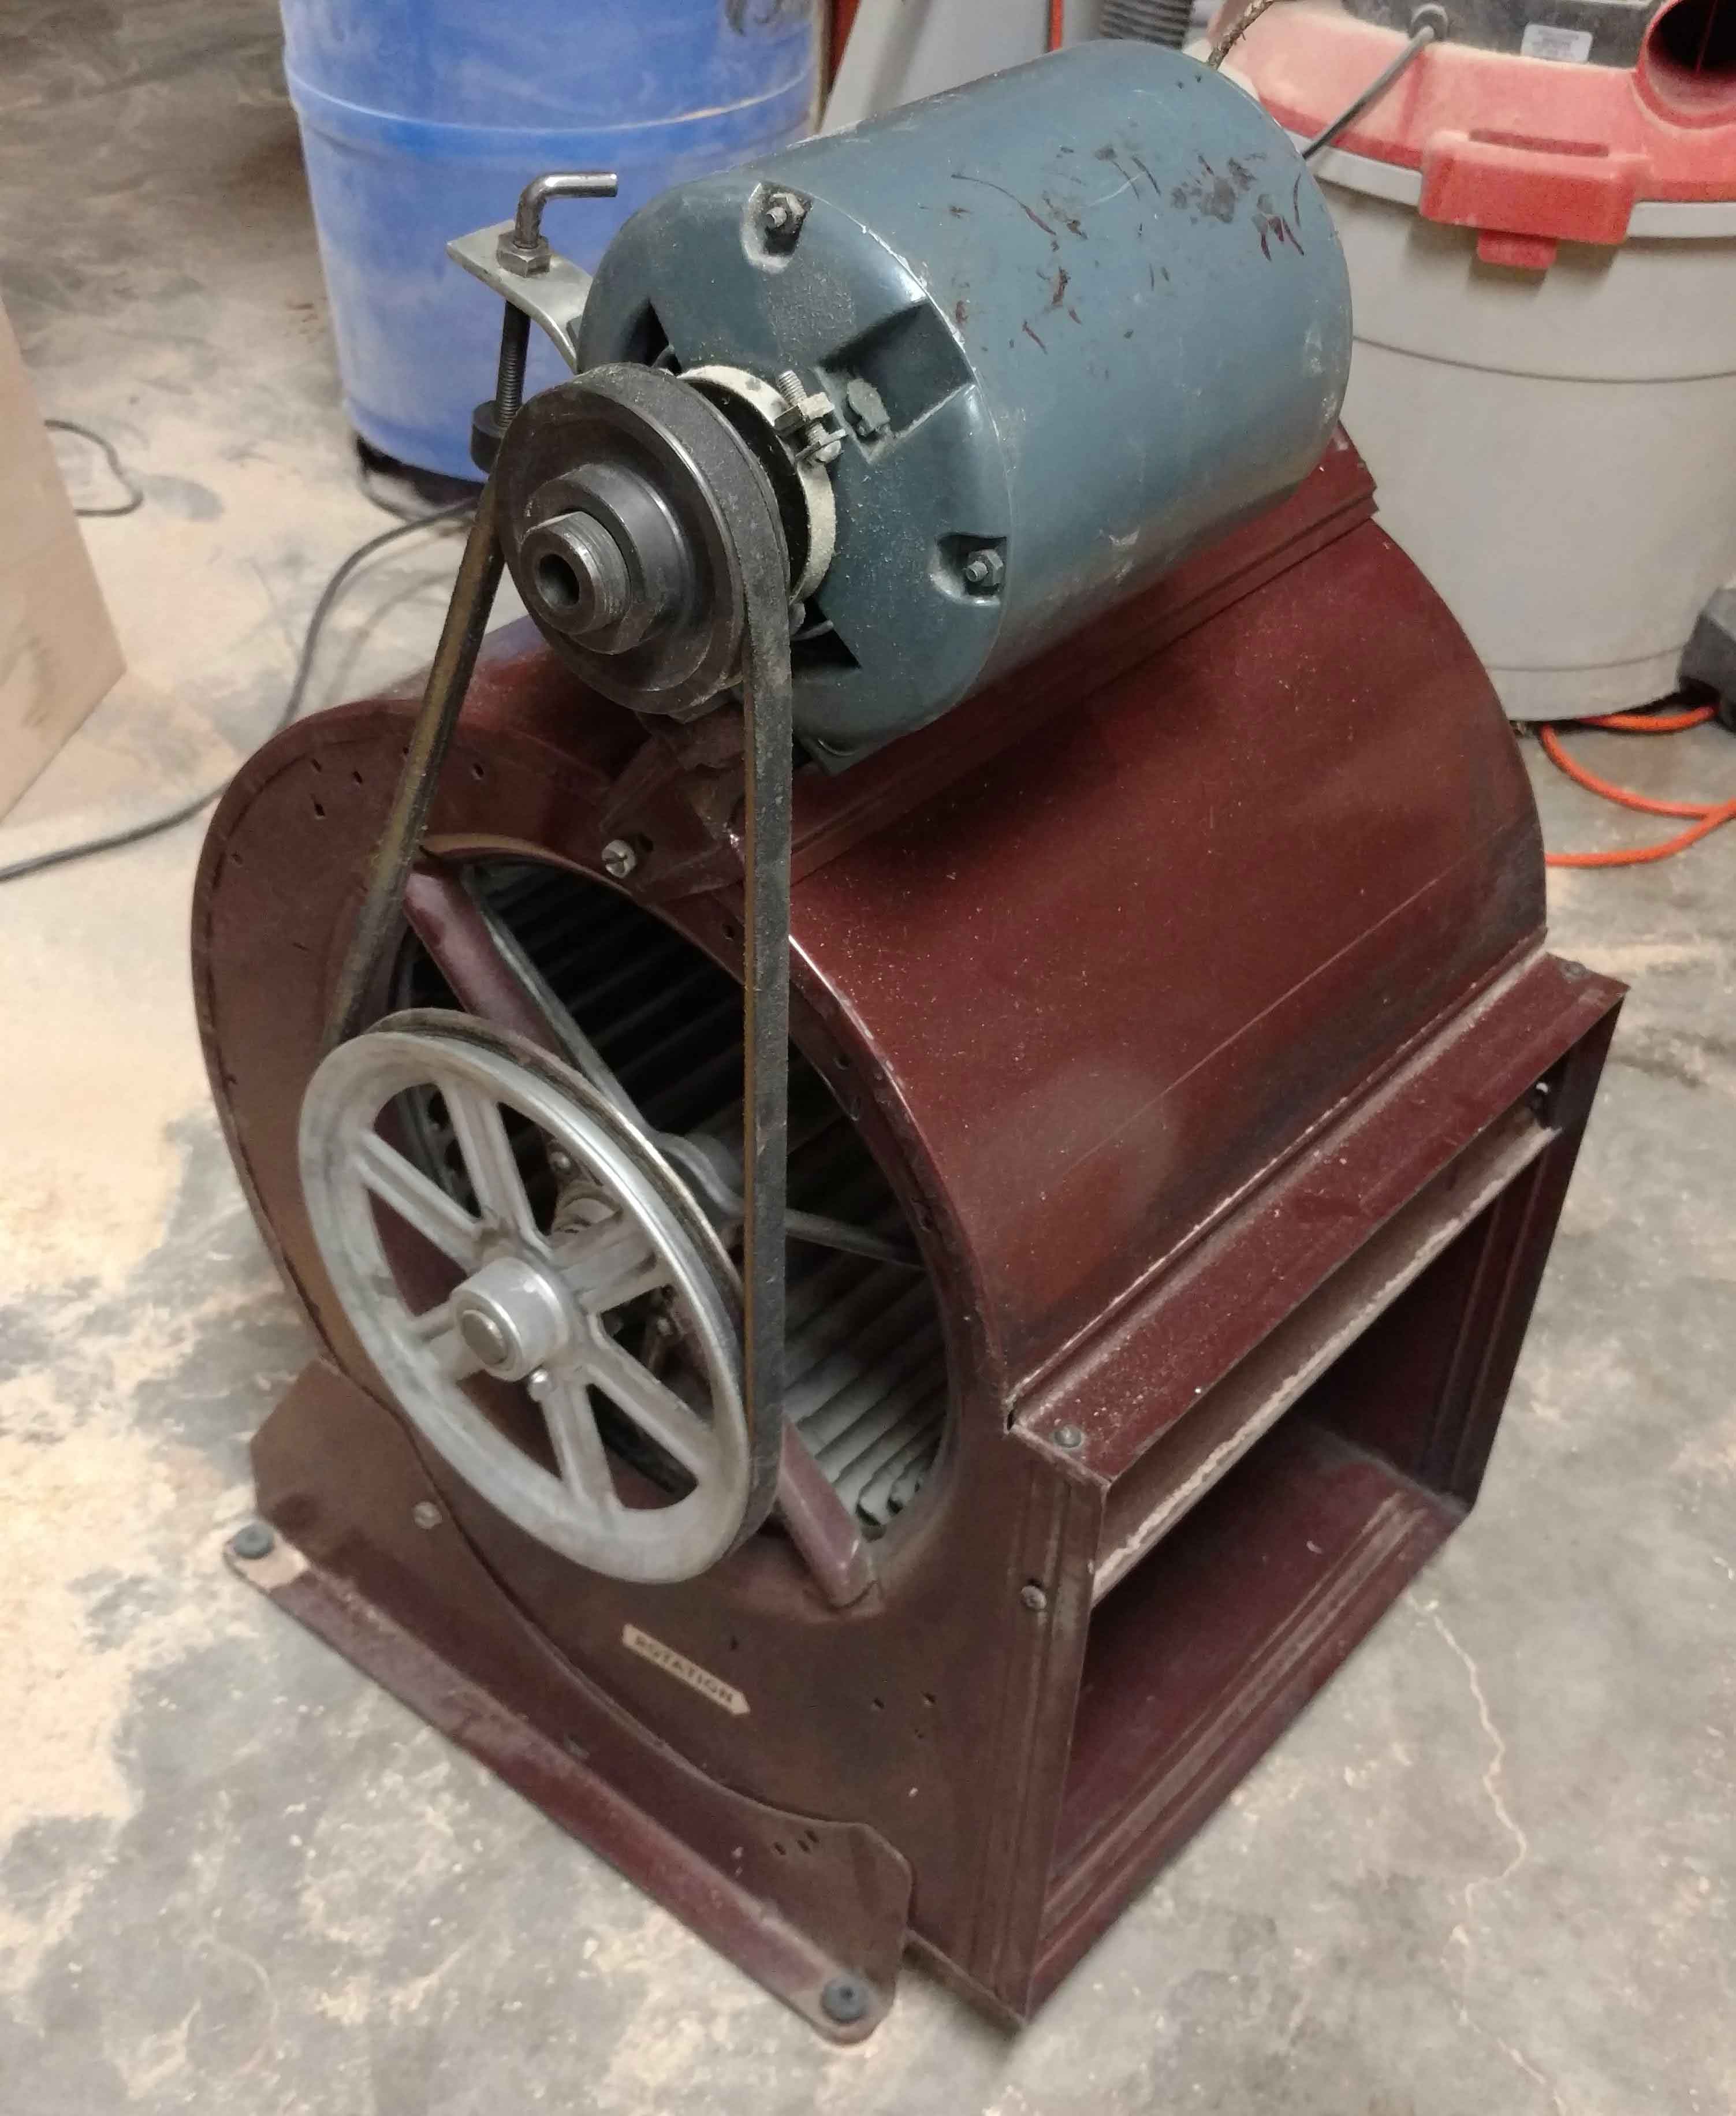
I looked on Craigslist for quite a while for a squirrel cage blower. I found that there is a huge range that people are asking for them, from $25 up to hundreds. Eventually I found a guy local enough that was priced right. I got the blower for $50, and it has an external motor and drive belt. The guy had just serviced it and it was in good shape.
I got the blower home and moved it around the shop, as it collected sawdust, for some number of months. Eventually, I needed the floorspace more than the blower did.
The Build

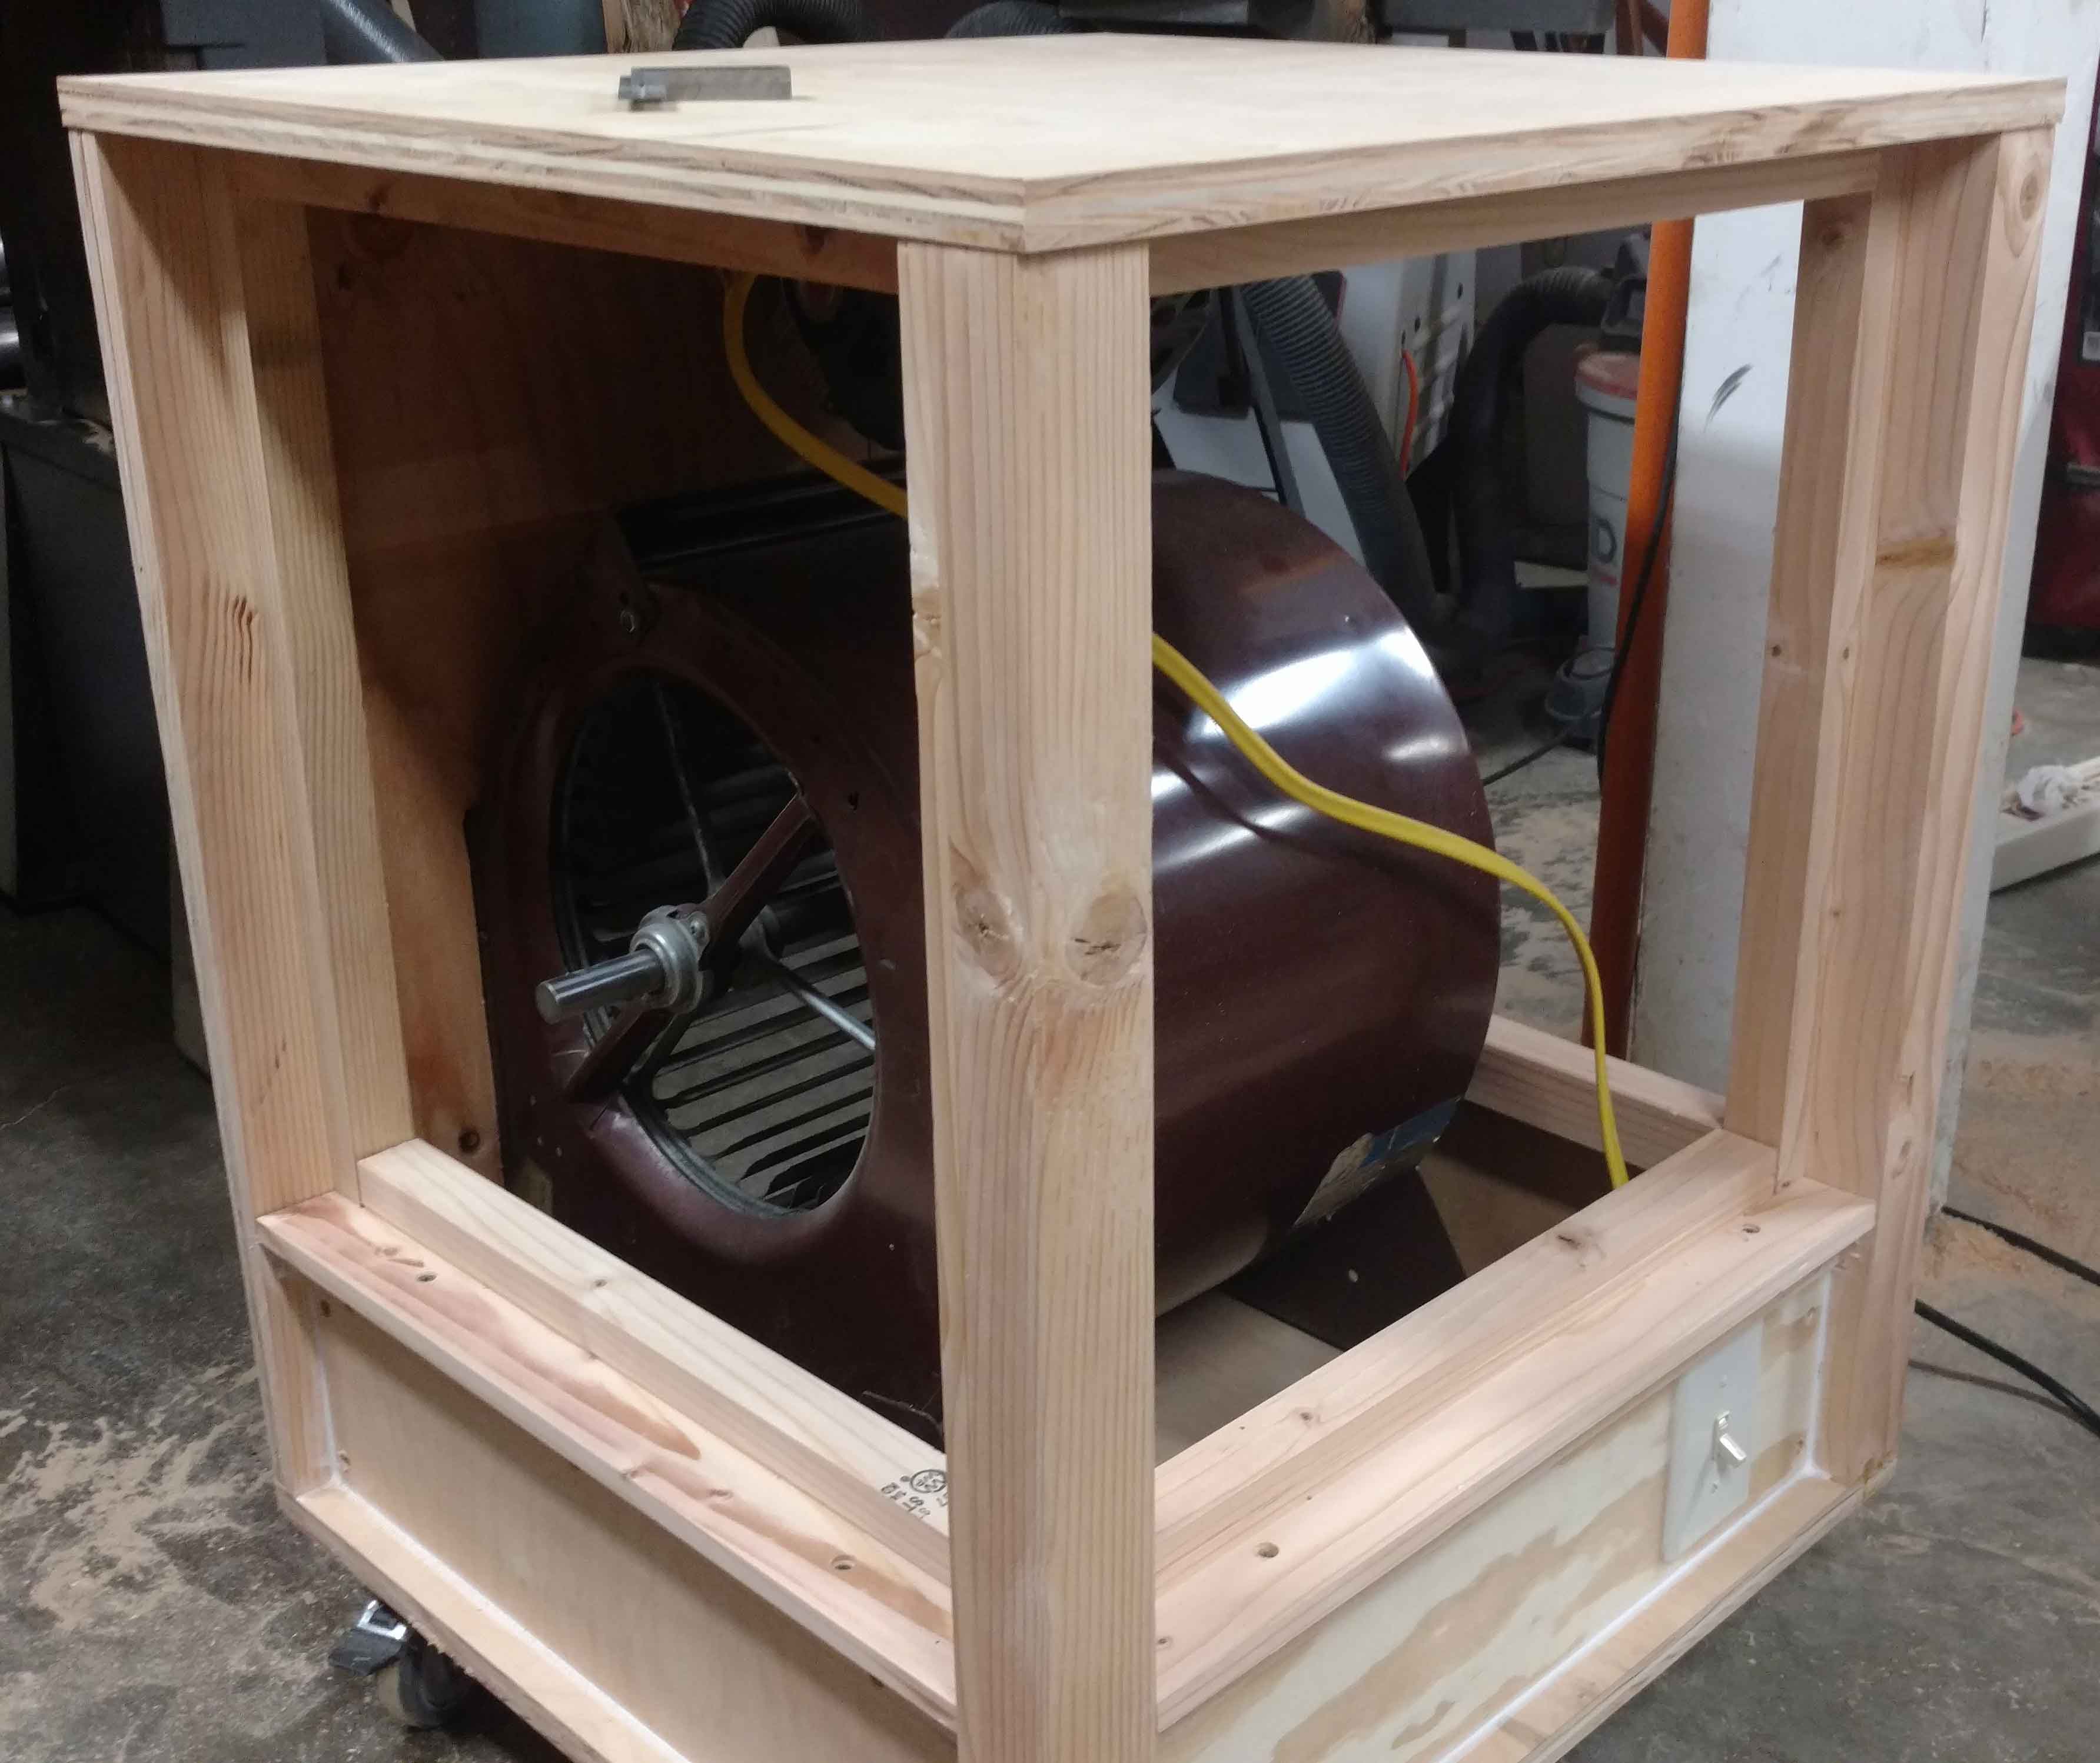
Firstly, I didn’t have any 4x4’s and didn’t want to buy any, so I ripped down some 2x4’s to 1-1/2" x 3" and glued them up to make 3x3 posts. I cut rabbets into the front and back legs for the filters and lower panels.
I used a piece of leftover 1/2" CDX for the back panel. I cut a hole for the blower exhaust with a jigsaw. The top and bottom were cut from 3/4" maple ply that I bought eons ago and was beginning to discolor. I drilled holes for the salvaged casters, and glued and screwed the posts and back panel. The blower itself was also fixed with bolts through the rubber mounts.
I made three lower panels from 3/4" AC plywood. The right side I drilled for the power cord, the left was left intact, and I cut a hole for the junction box in the front. I ended up using a low-profile blue plastic junction box, cutting the hole with an oscillating saw. That didn’t work as well as I expected, but I got it done.
For the wiring, I used a tool cord replacement, a standard light switch, and a length of Romex to the motor. The wiring was pretty straightforward. Once I got it all stuffed into that little box, I sealed it up with caulk. Theoretically there shouldn’t be any dust floating around inside the cart, but an ounce of prevention is worth a pound of not going up in an electrical fire.
I rabbeted some 2x4’s (cut to 3" wide) and cut end notches on my bandsaw so they would sit on top of the lower panels. These gave the lower panels a finished look as well as held in the filters on the bottom edge. I also glued and screwed strips under the top, to do the same up there. Caulk again sealed the gaps. Finally, the top was mounted and so was the planer. Viola!
This was a pretty straightforward build, and it would be fairly tolerant of sloppy measurement, due to the gap-sealing qualities of silicone caulk. I’m pretty happy with the end result. It runs quietly enough I can have it on during a stream, but it does kick up quite a bit of wind. That should be nice in the summer. Cleaning up is pretty easy too, I just run the vacuum across the filters every once in a while or take them outside and knock them out.