Alder and Leather Honing Strop
Recently I needed a leather strop to take care of the cutting edges of my chisels and gouges. I have one for my kitchen knives, but it isn’t mounted to a backer, and I wanted one I could easily hold with my vise. I decided to make a honing strop with some leather I got from the leather shop and some alder I had around the shop.
Trip to the Leather Shop
First thing that I needed for this build was some leather. I’ve never done anything with it, so I needed a little education as well. I headed to my local Tandy Leather and was able to pick up a little bit of knowledge. I knew that I wanted leather of approximately 3/16", and I found that leather is measured in ounces in the industry. 3/16" would be in the 7-9 oz. range, as 1 oz. is about 1/64th of an inch.
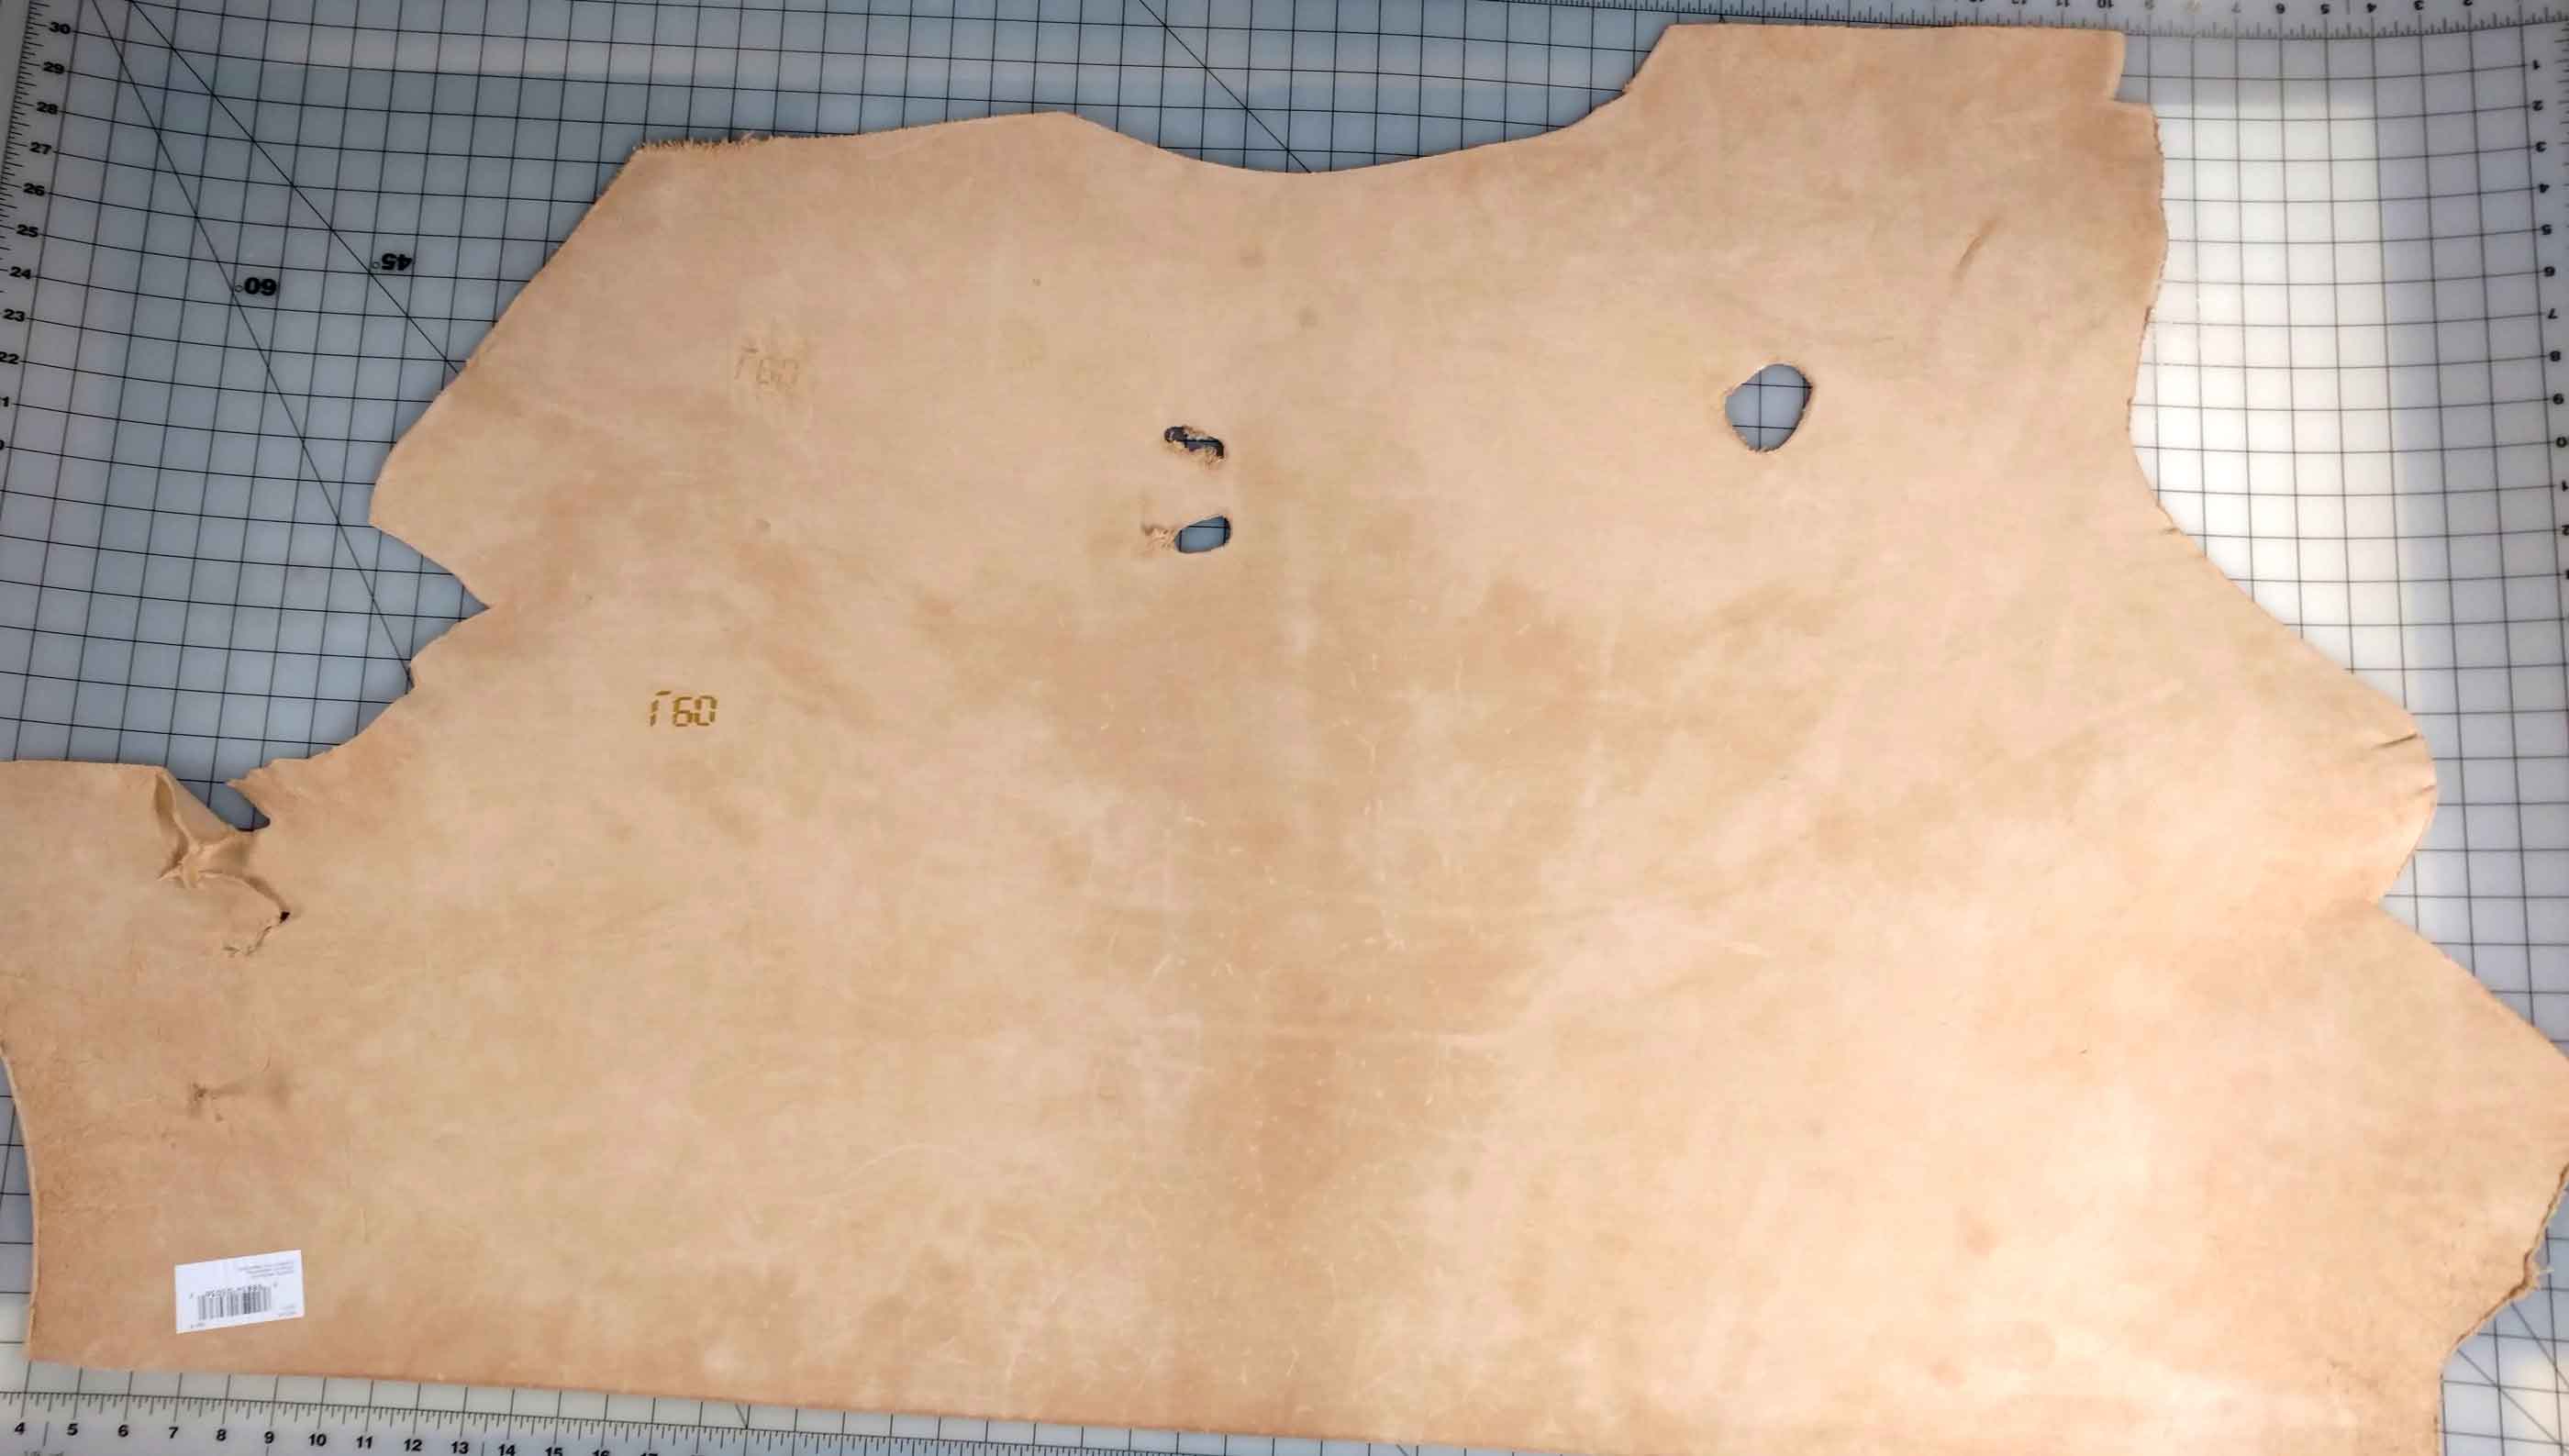
I could have gotten away with just a scrap, but I also wanted some leather for a few other things, so I ended up with a 7-9 oz. piece about 10 square feet in size. It was way more than I needed, but it was a great deal, and the guy at the shop told me that I can roll it up and have enough for the next 10 years. He might be right on that.
Making the Mounting Block
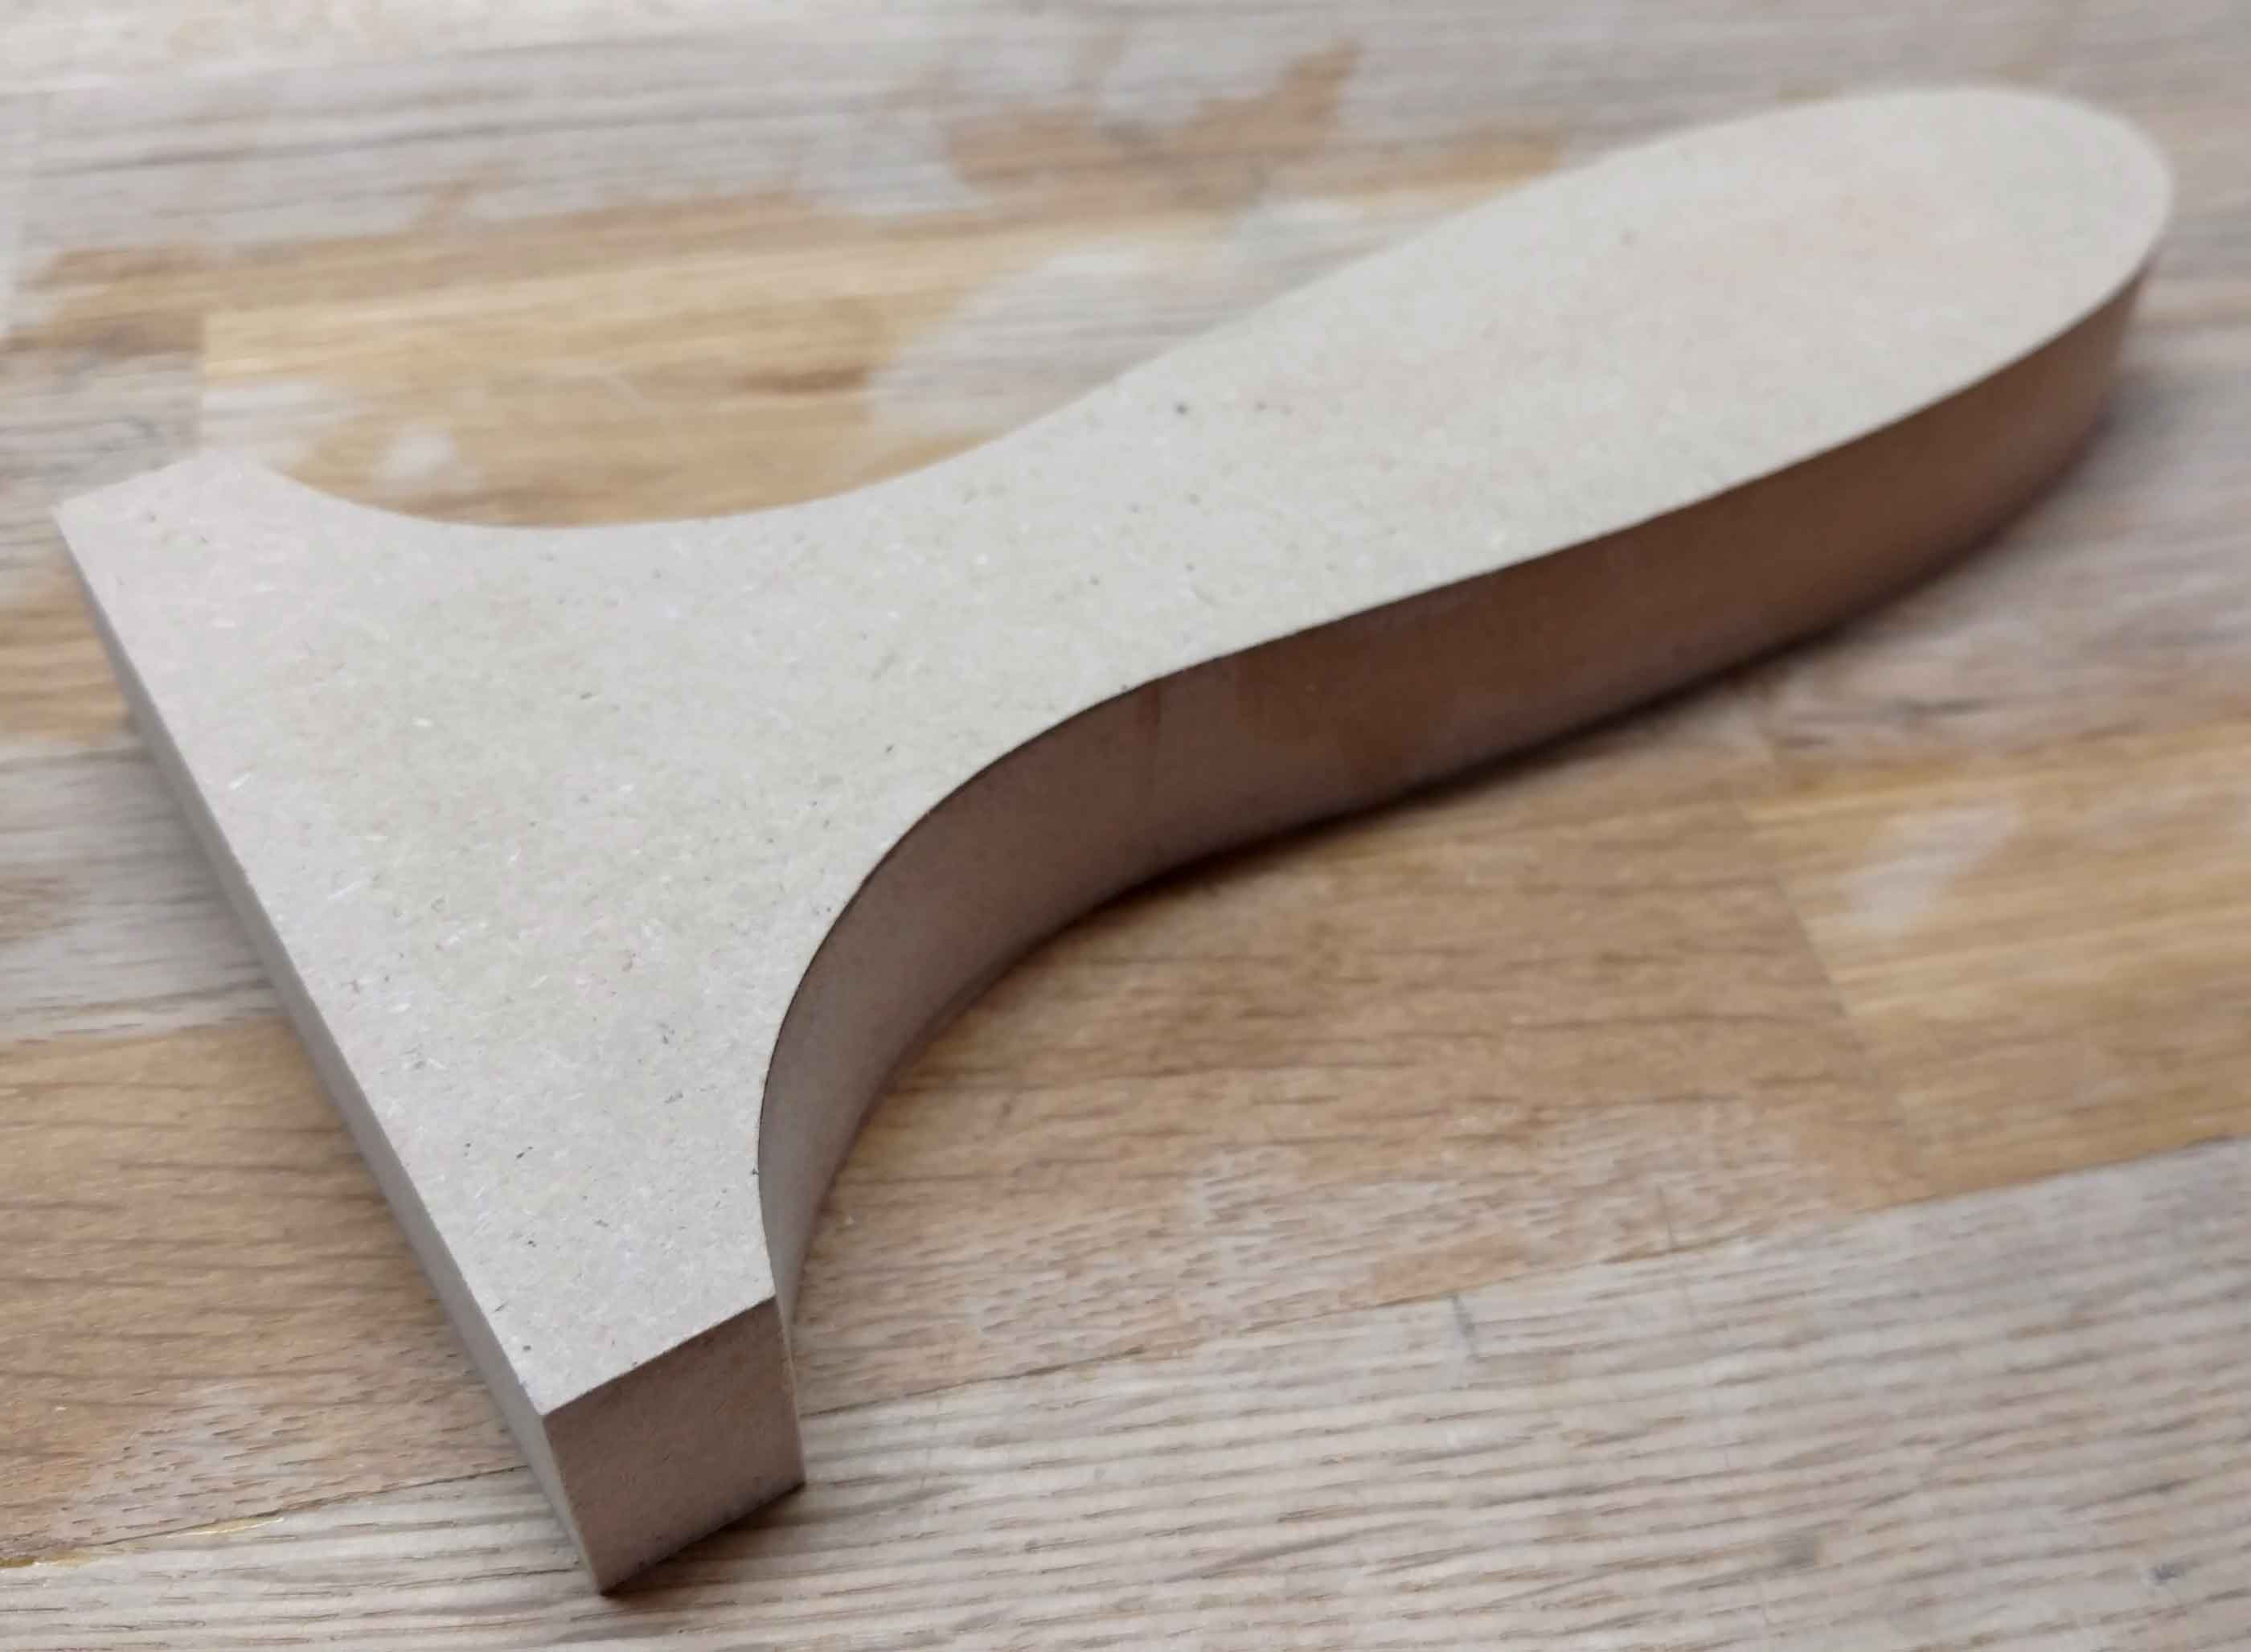
The block that the leather was to be mounted was pretty straightforward. I first made a handle pattern, tracing and slightly modifying a paintbrush handle that I find comfortable to hold. I cut the handle pattern out of 3/4" mdf on the bandsaw and smoothed and final-shaped it on the belt sander. A lot of nasty dust was thrown; glad that I made that air cleaner cart.
The block/handle was pretty straightforward. Before I pattern cut the handle, I cut a recess for the leather. I did this with a dado blade on my tablesaw and crosscut it using just a miter gauge. This wasn’t necessary, but I wanted the top of the leather surface to be flush with the top of the handle. I feel that it looks a little cleaner that way.
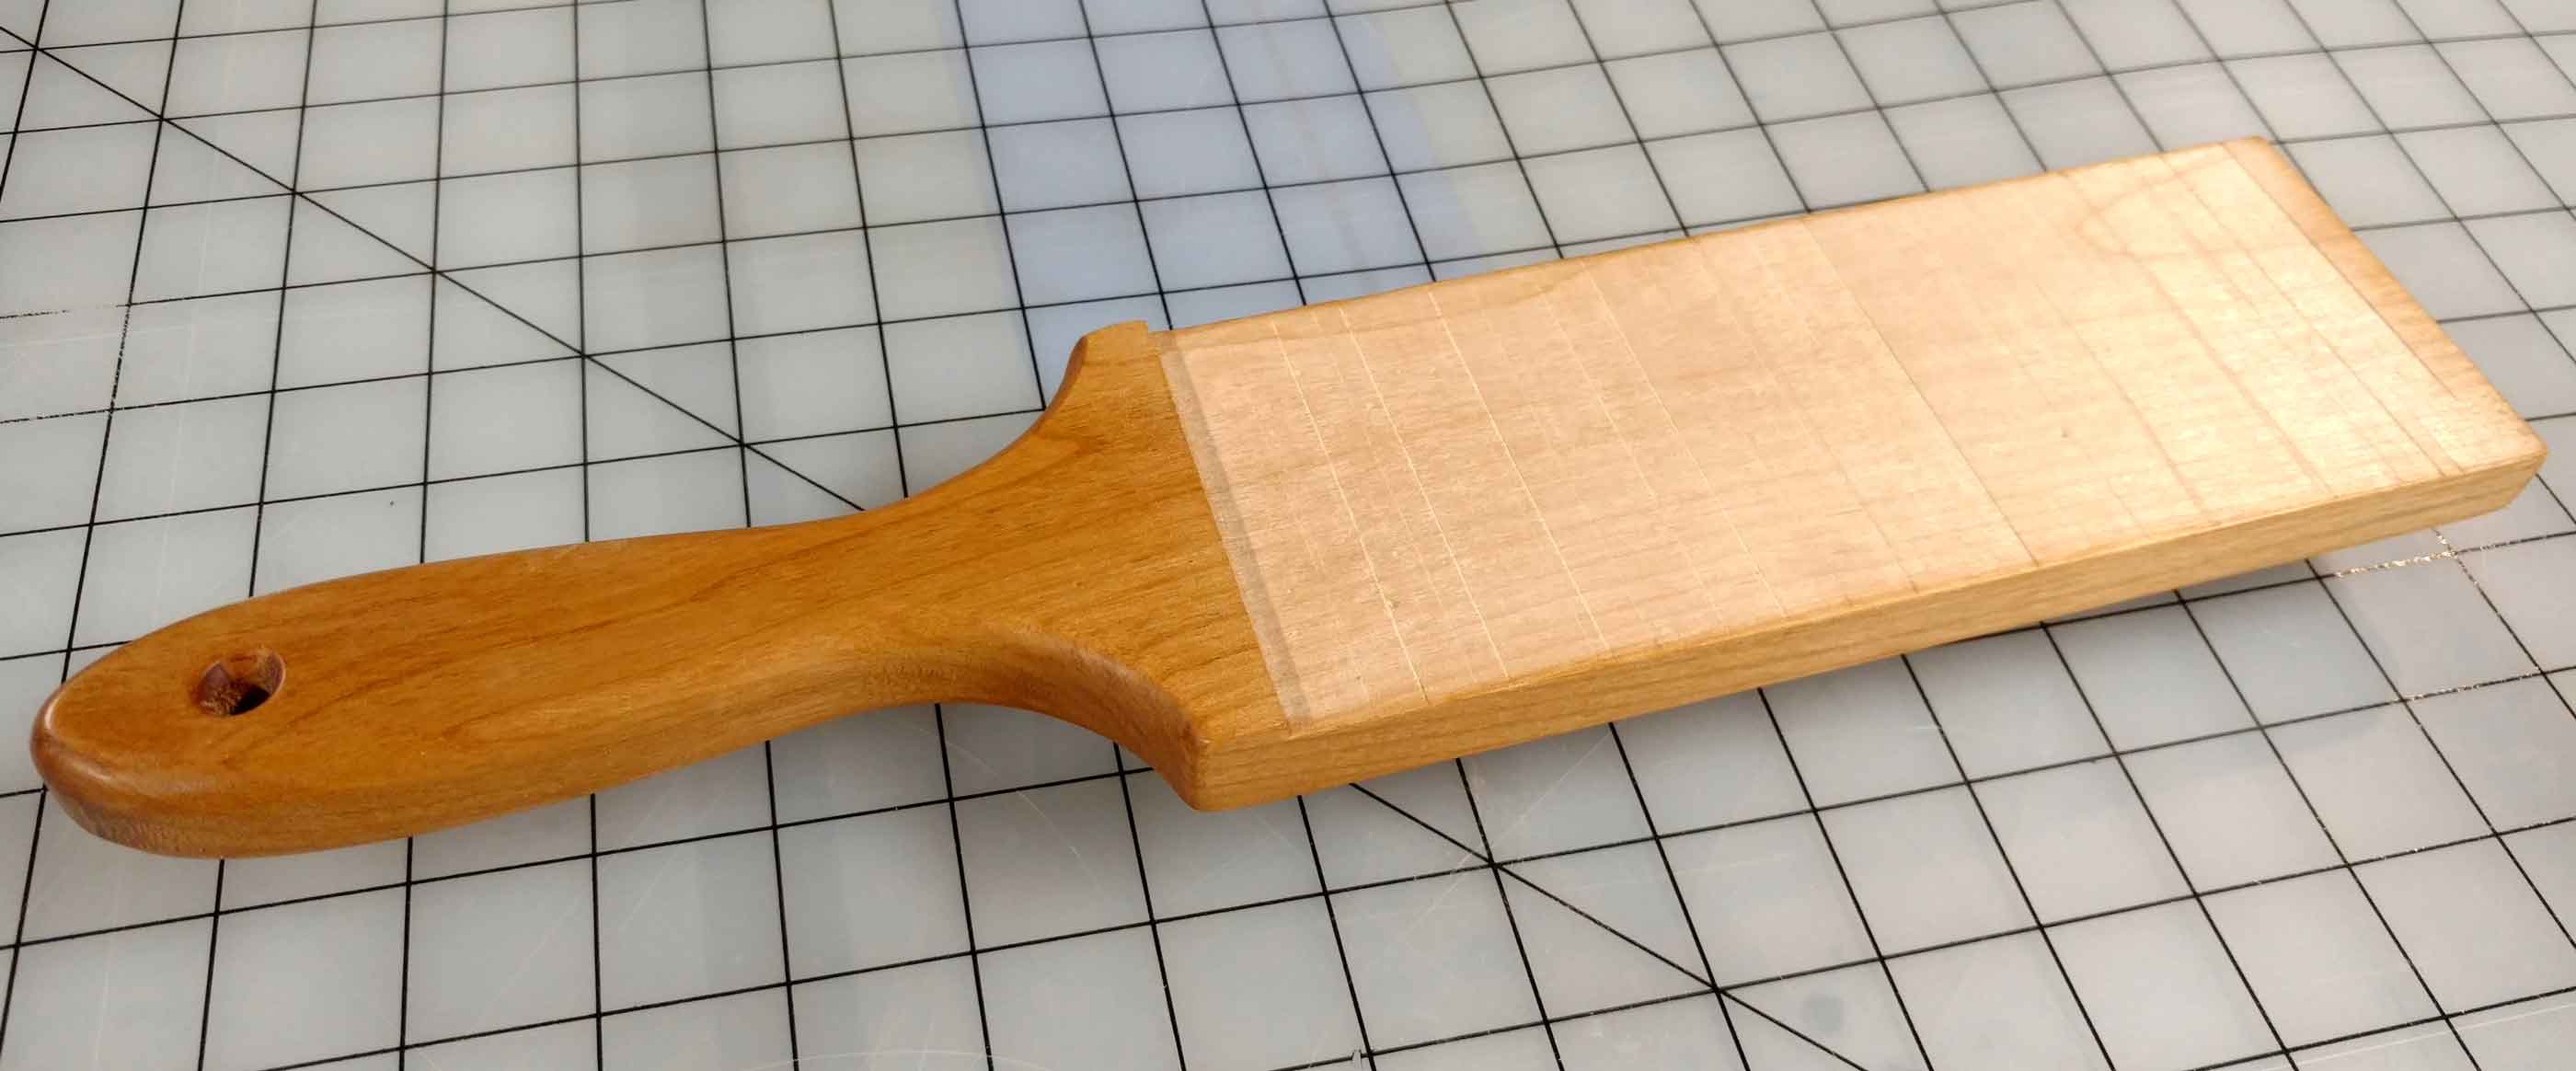
I decided that it would be best to prefinish the wood prior to fixing the leather, to prevent a bunch of finish from soaking into it. The finish that I applied was three coats of teak oil followed by a coat of paste wax. It turned out pretty nice.
Fixing the Leather
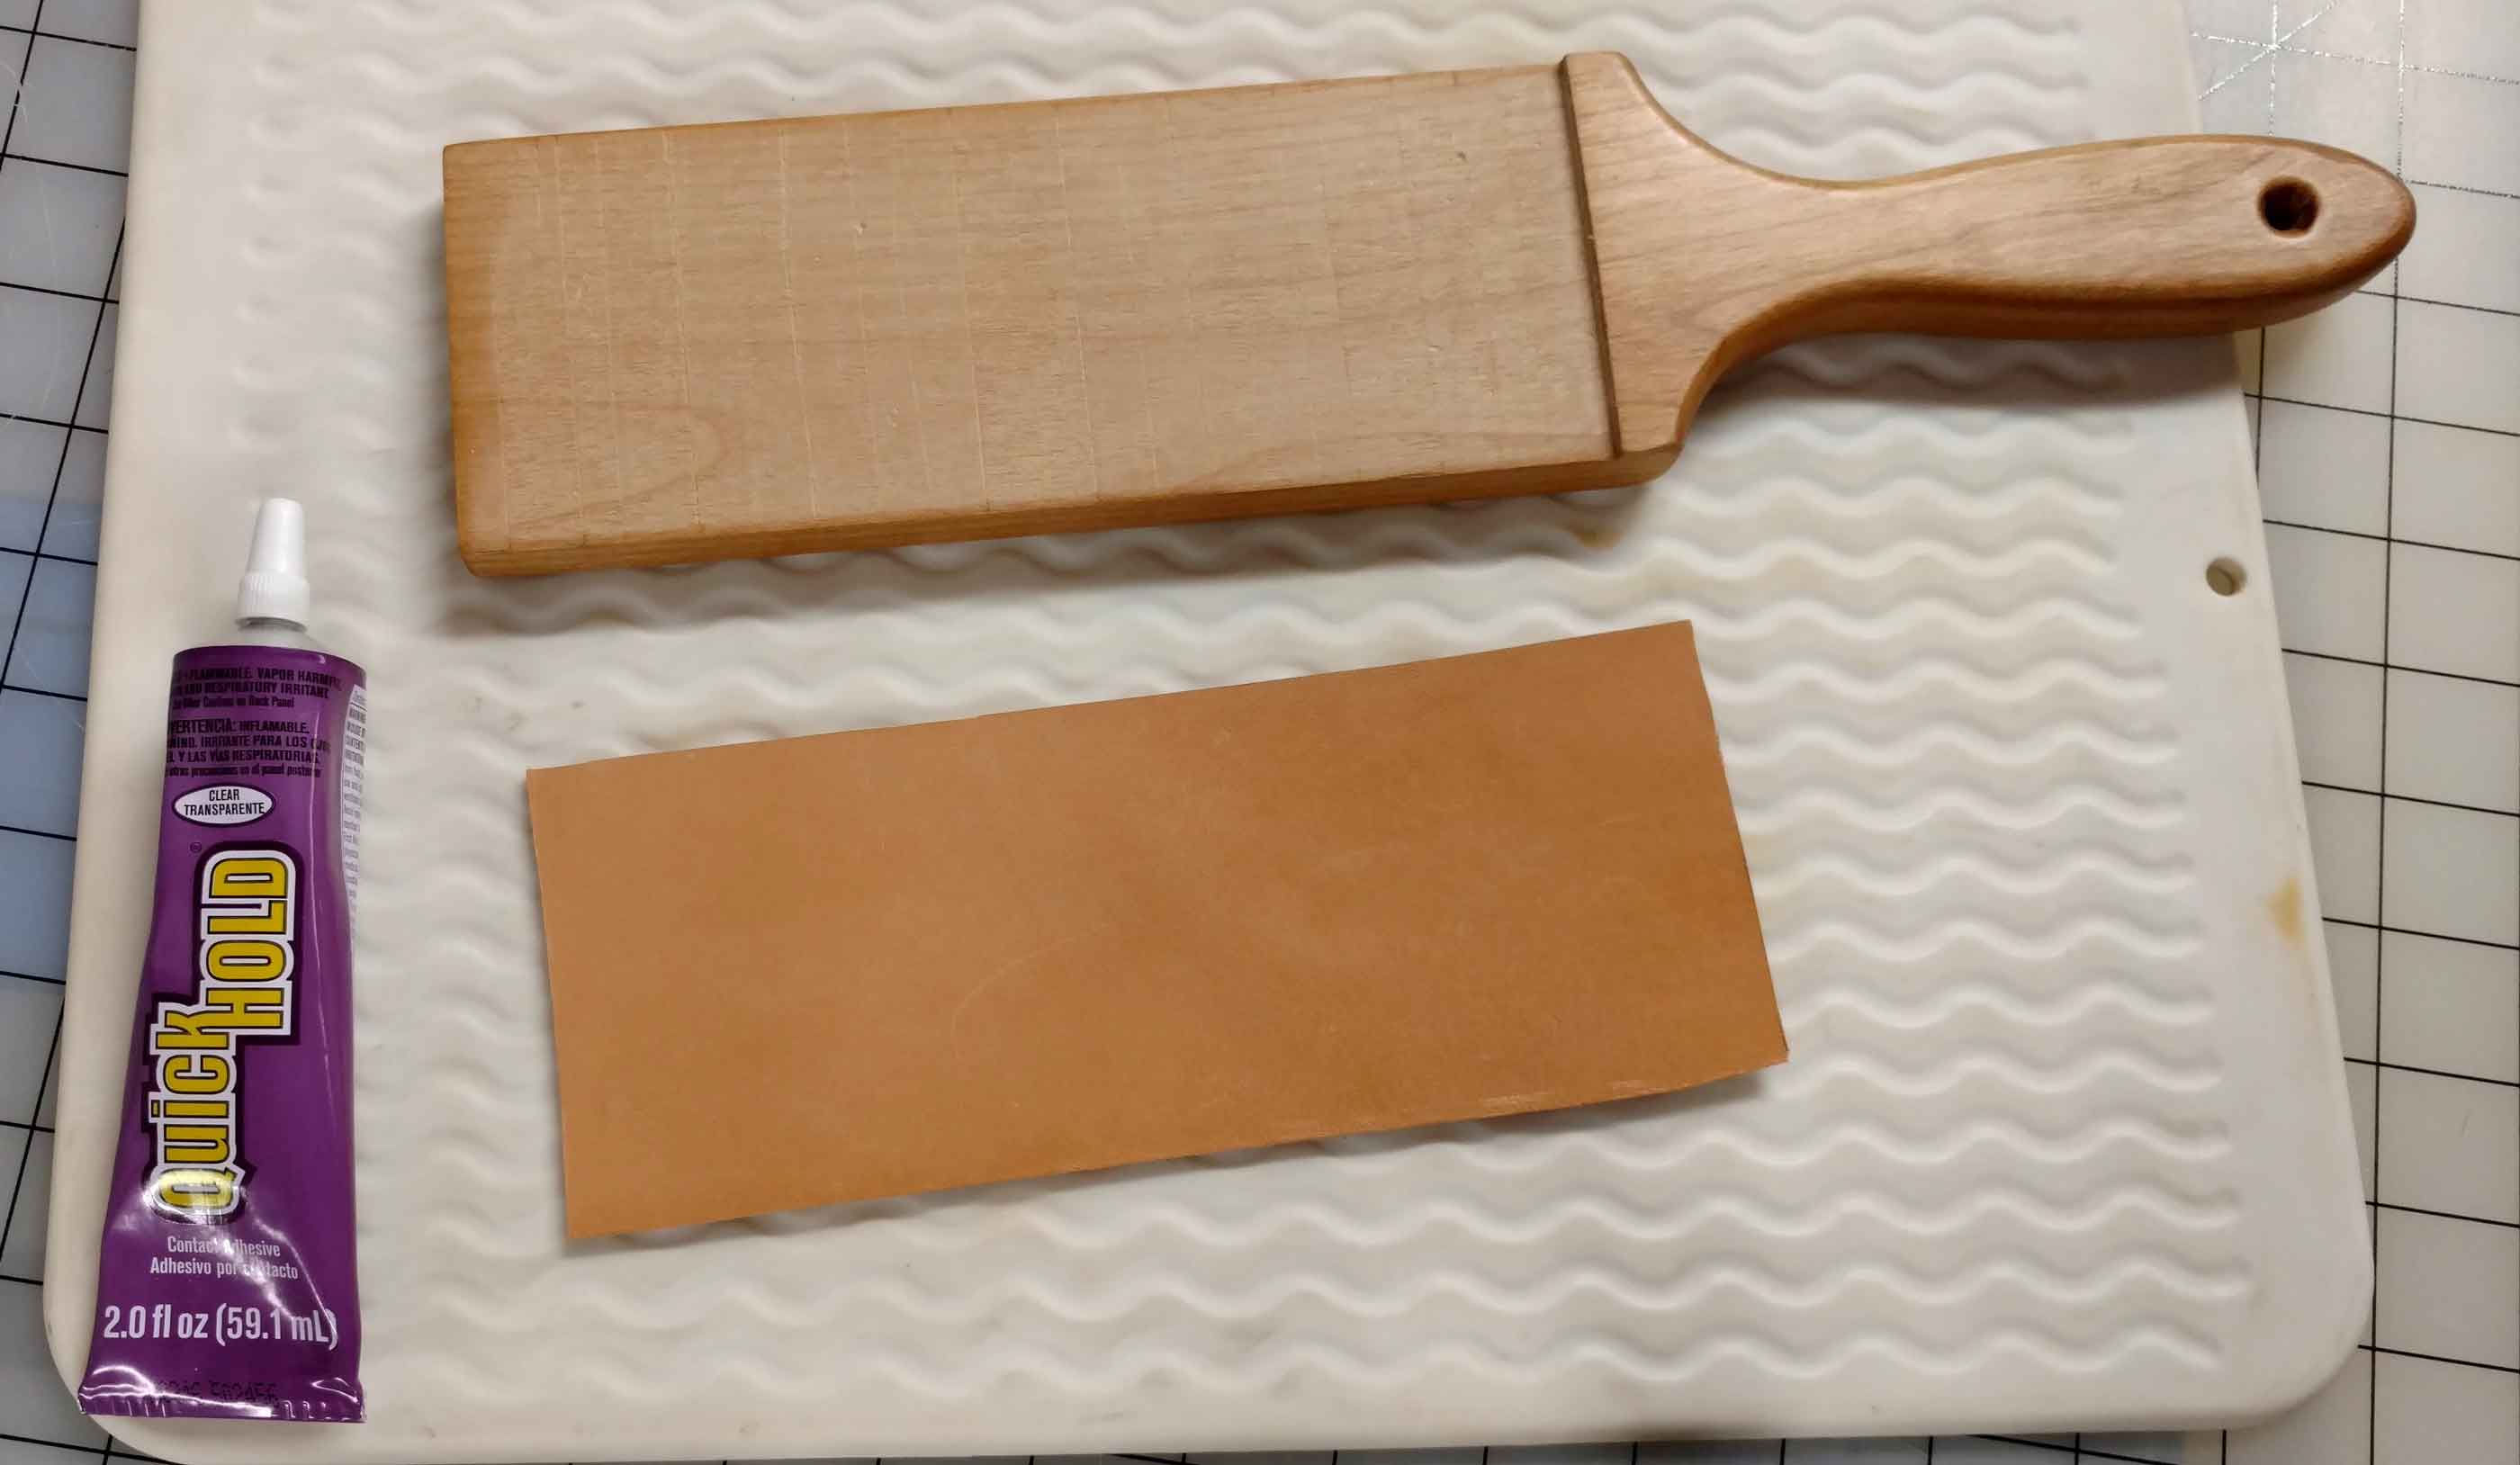
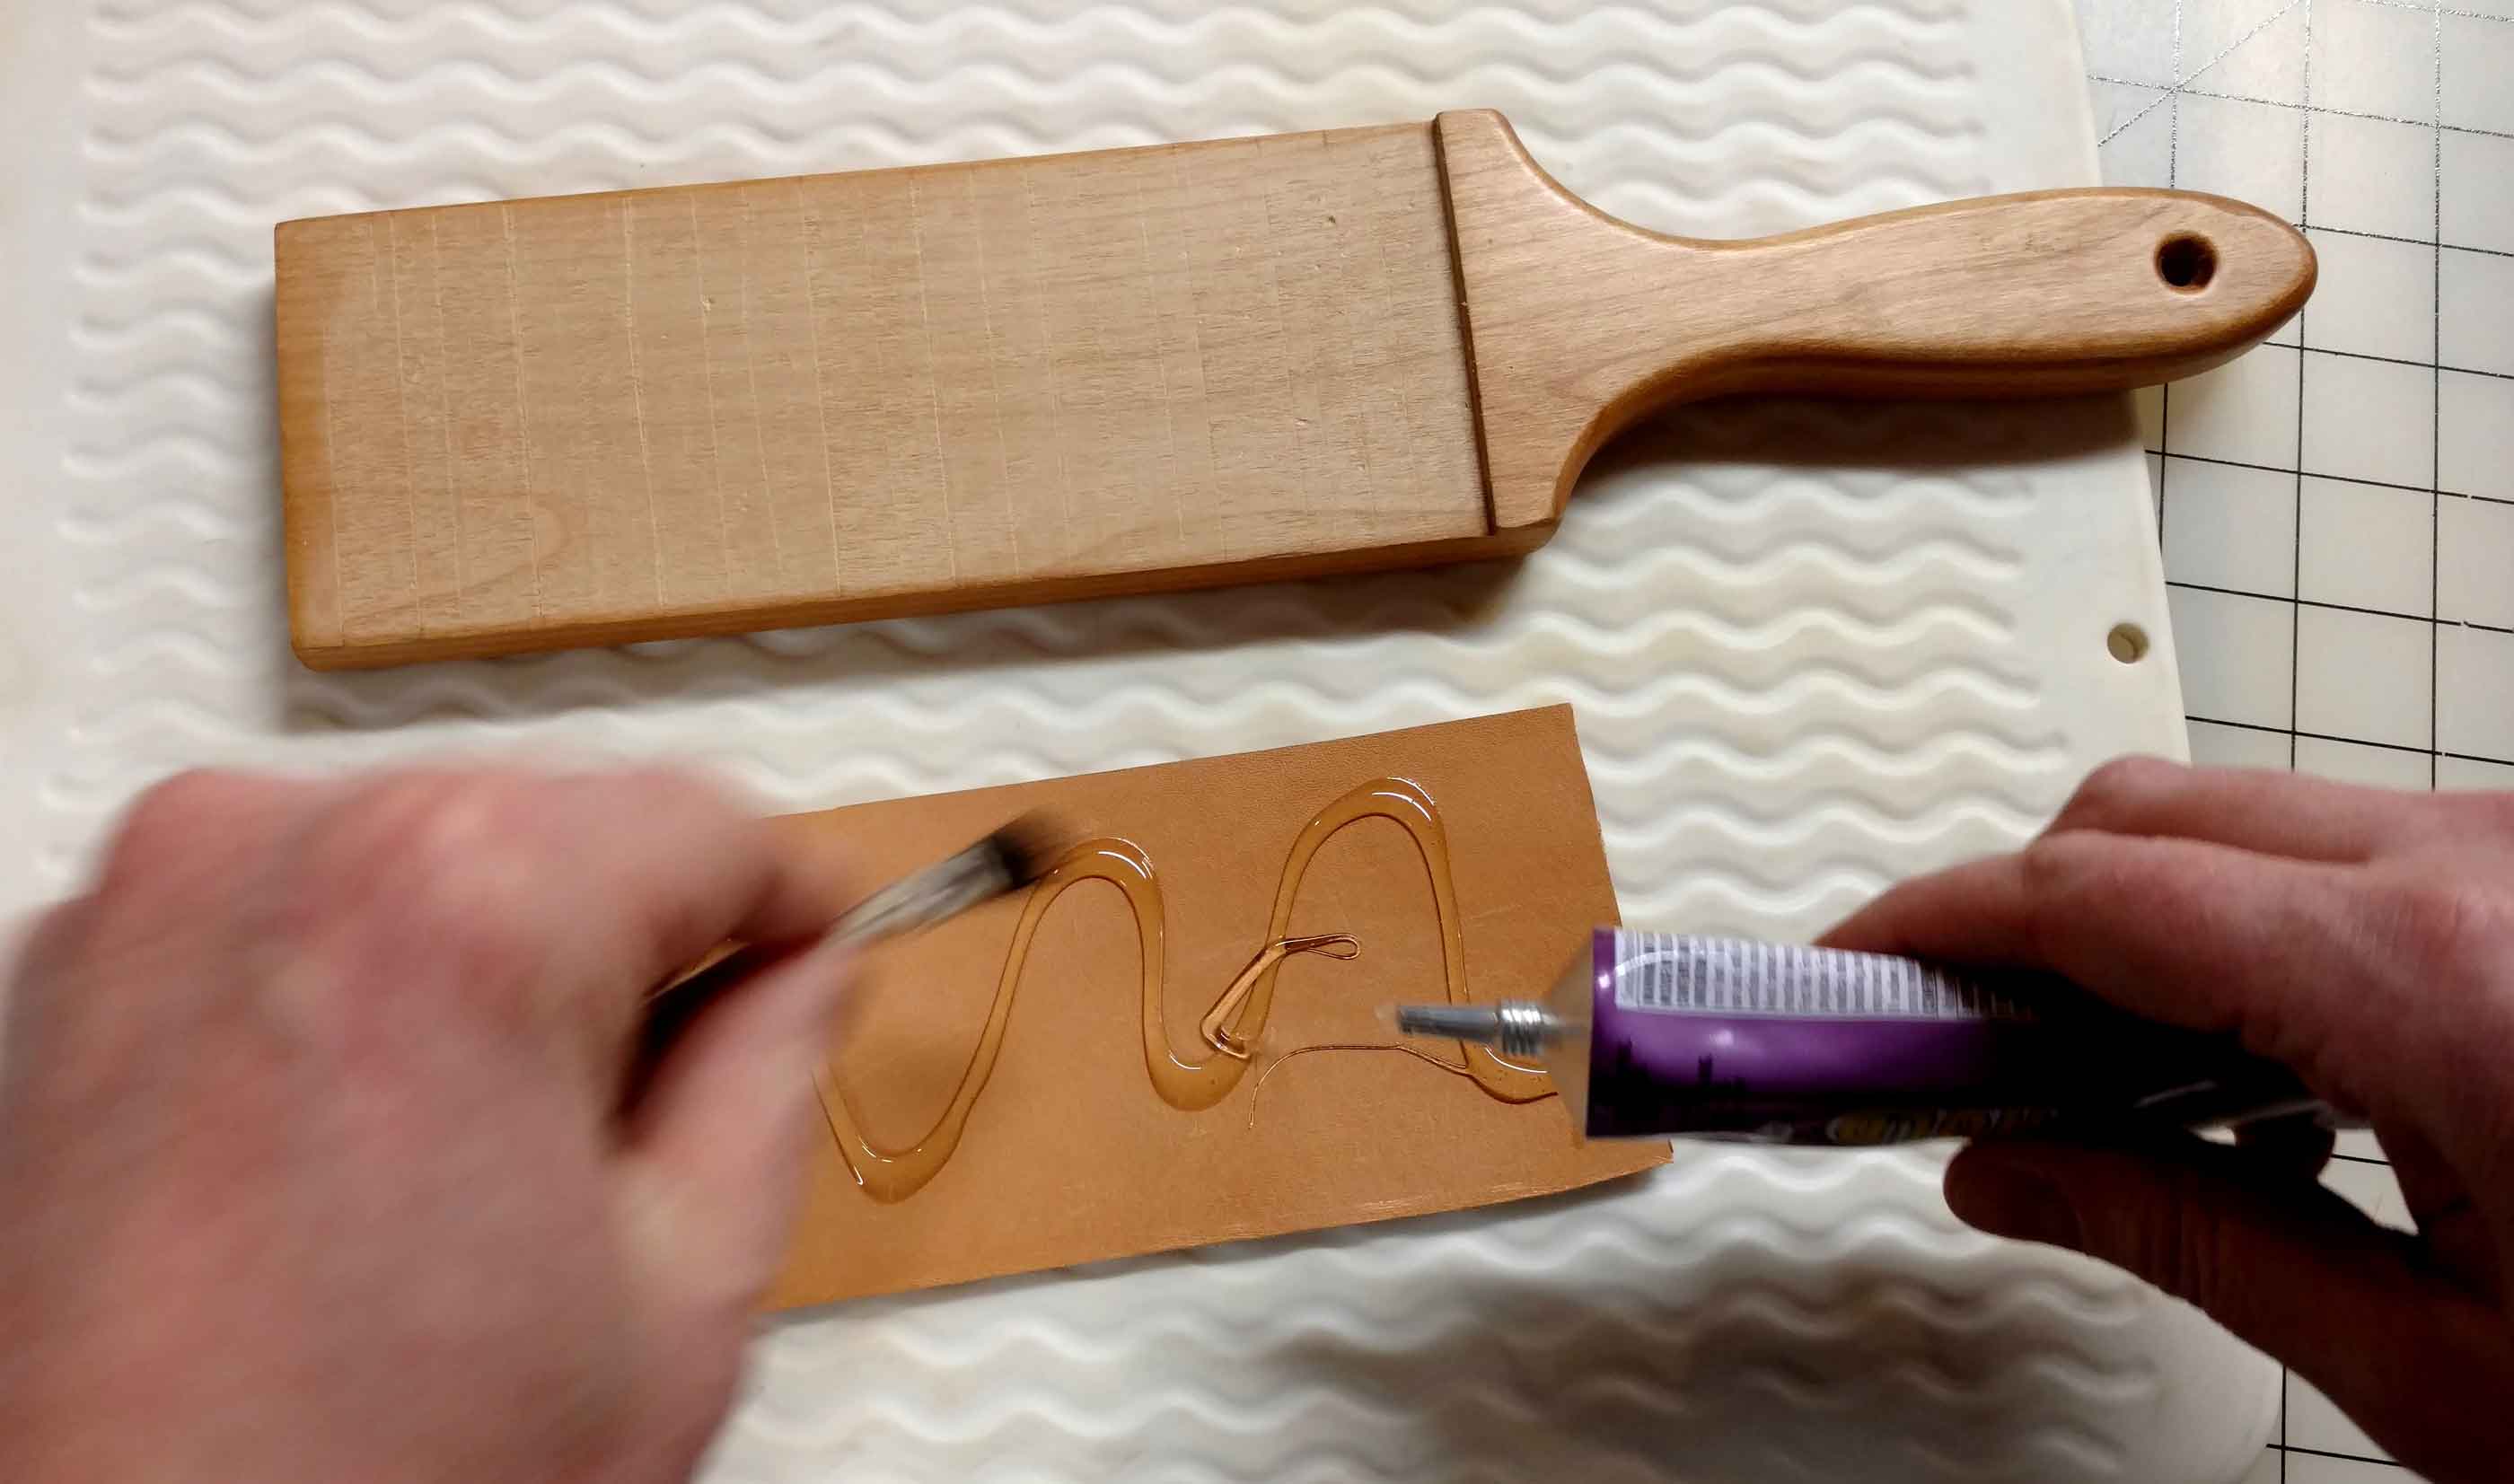
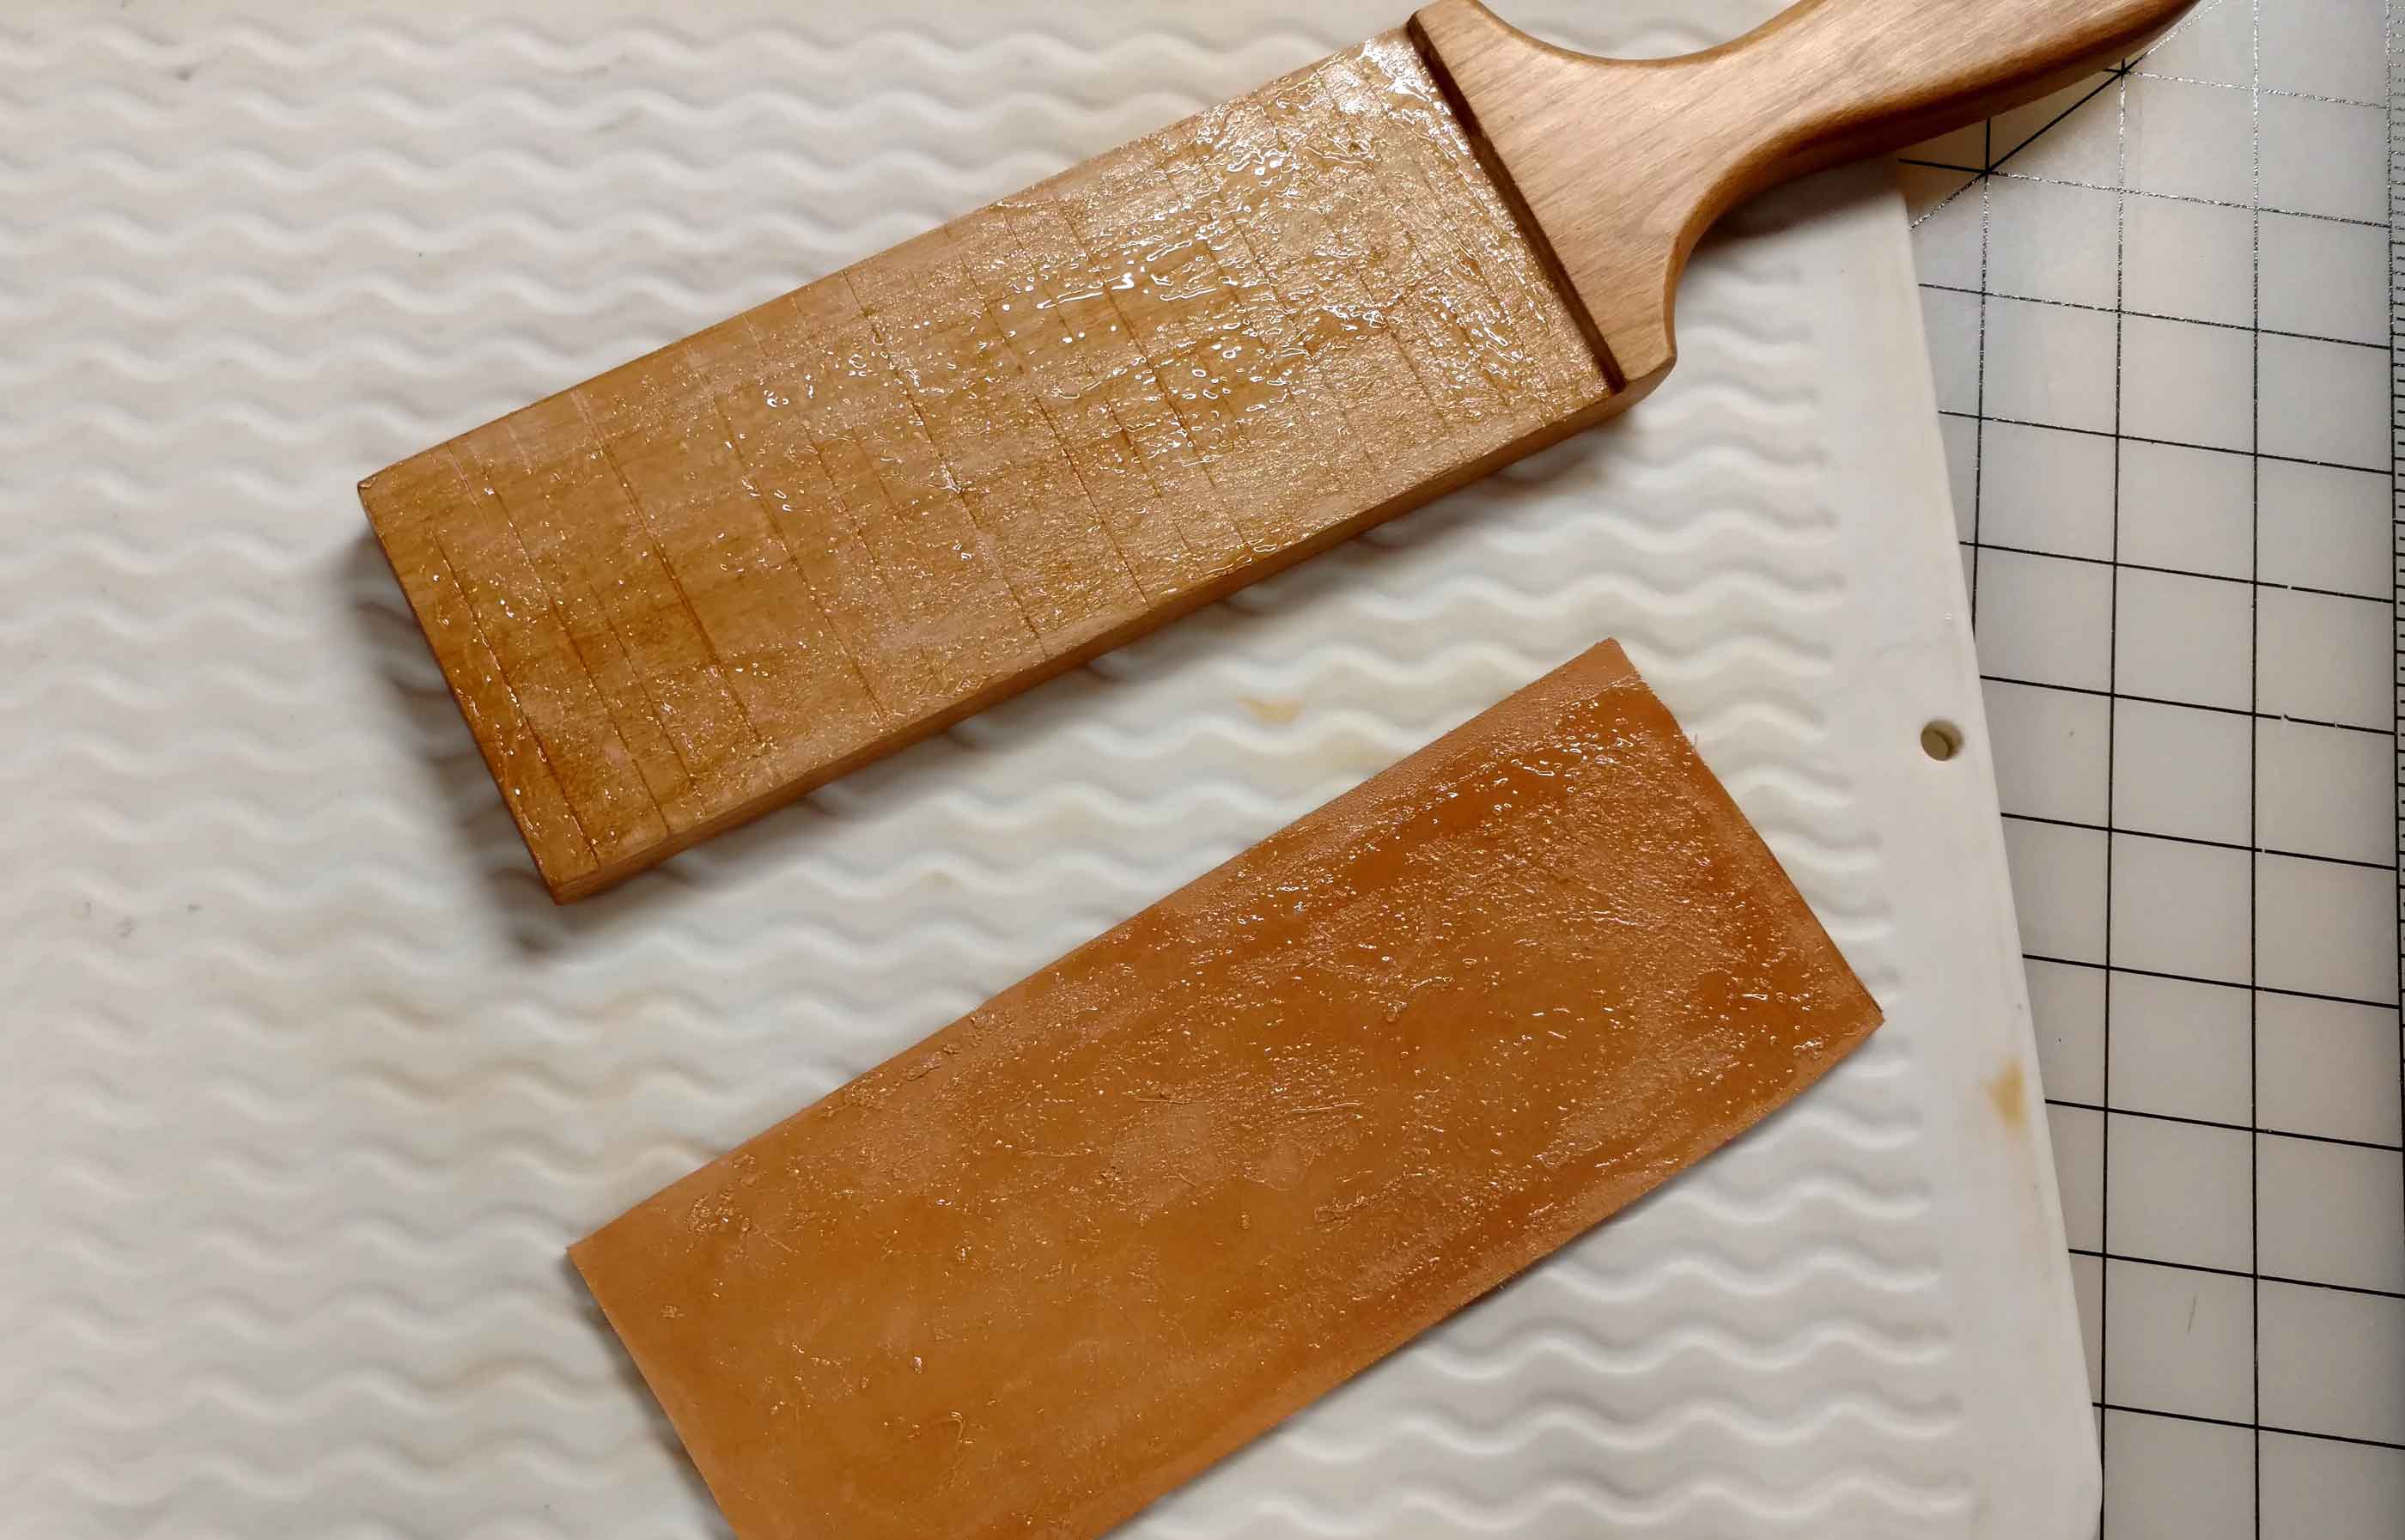
We’re in the home stretch! Leather can be glued in countless ways, but the consensus is contact cement is the best. I picked up this tube of Quick Hold cement at JoAnn Fabrics. While it did the job, It was somewhat difficult to deal with. It is designed to dry quickly so it started to dry and clump up before I could even get an even coat laid down. Next time, I’m going to pick up a tube of Barge Cement or a can of Weldwood.
Before I got to gluing, I cut out the leather slightly oversized. I spread the contact cement on the bottom of the leather and the top of the wood block with an toss-away acid brush. Like I said earlier, it got really clumpy and was difficult the spread out, but I managed to get it completely covered. Dry time was very short, and then the contact cemented surfaces just need to be pressed together. You only get one shot, so proper alignment is critical.

Finishing Up

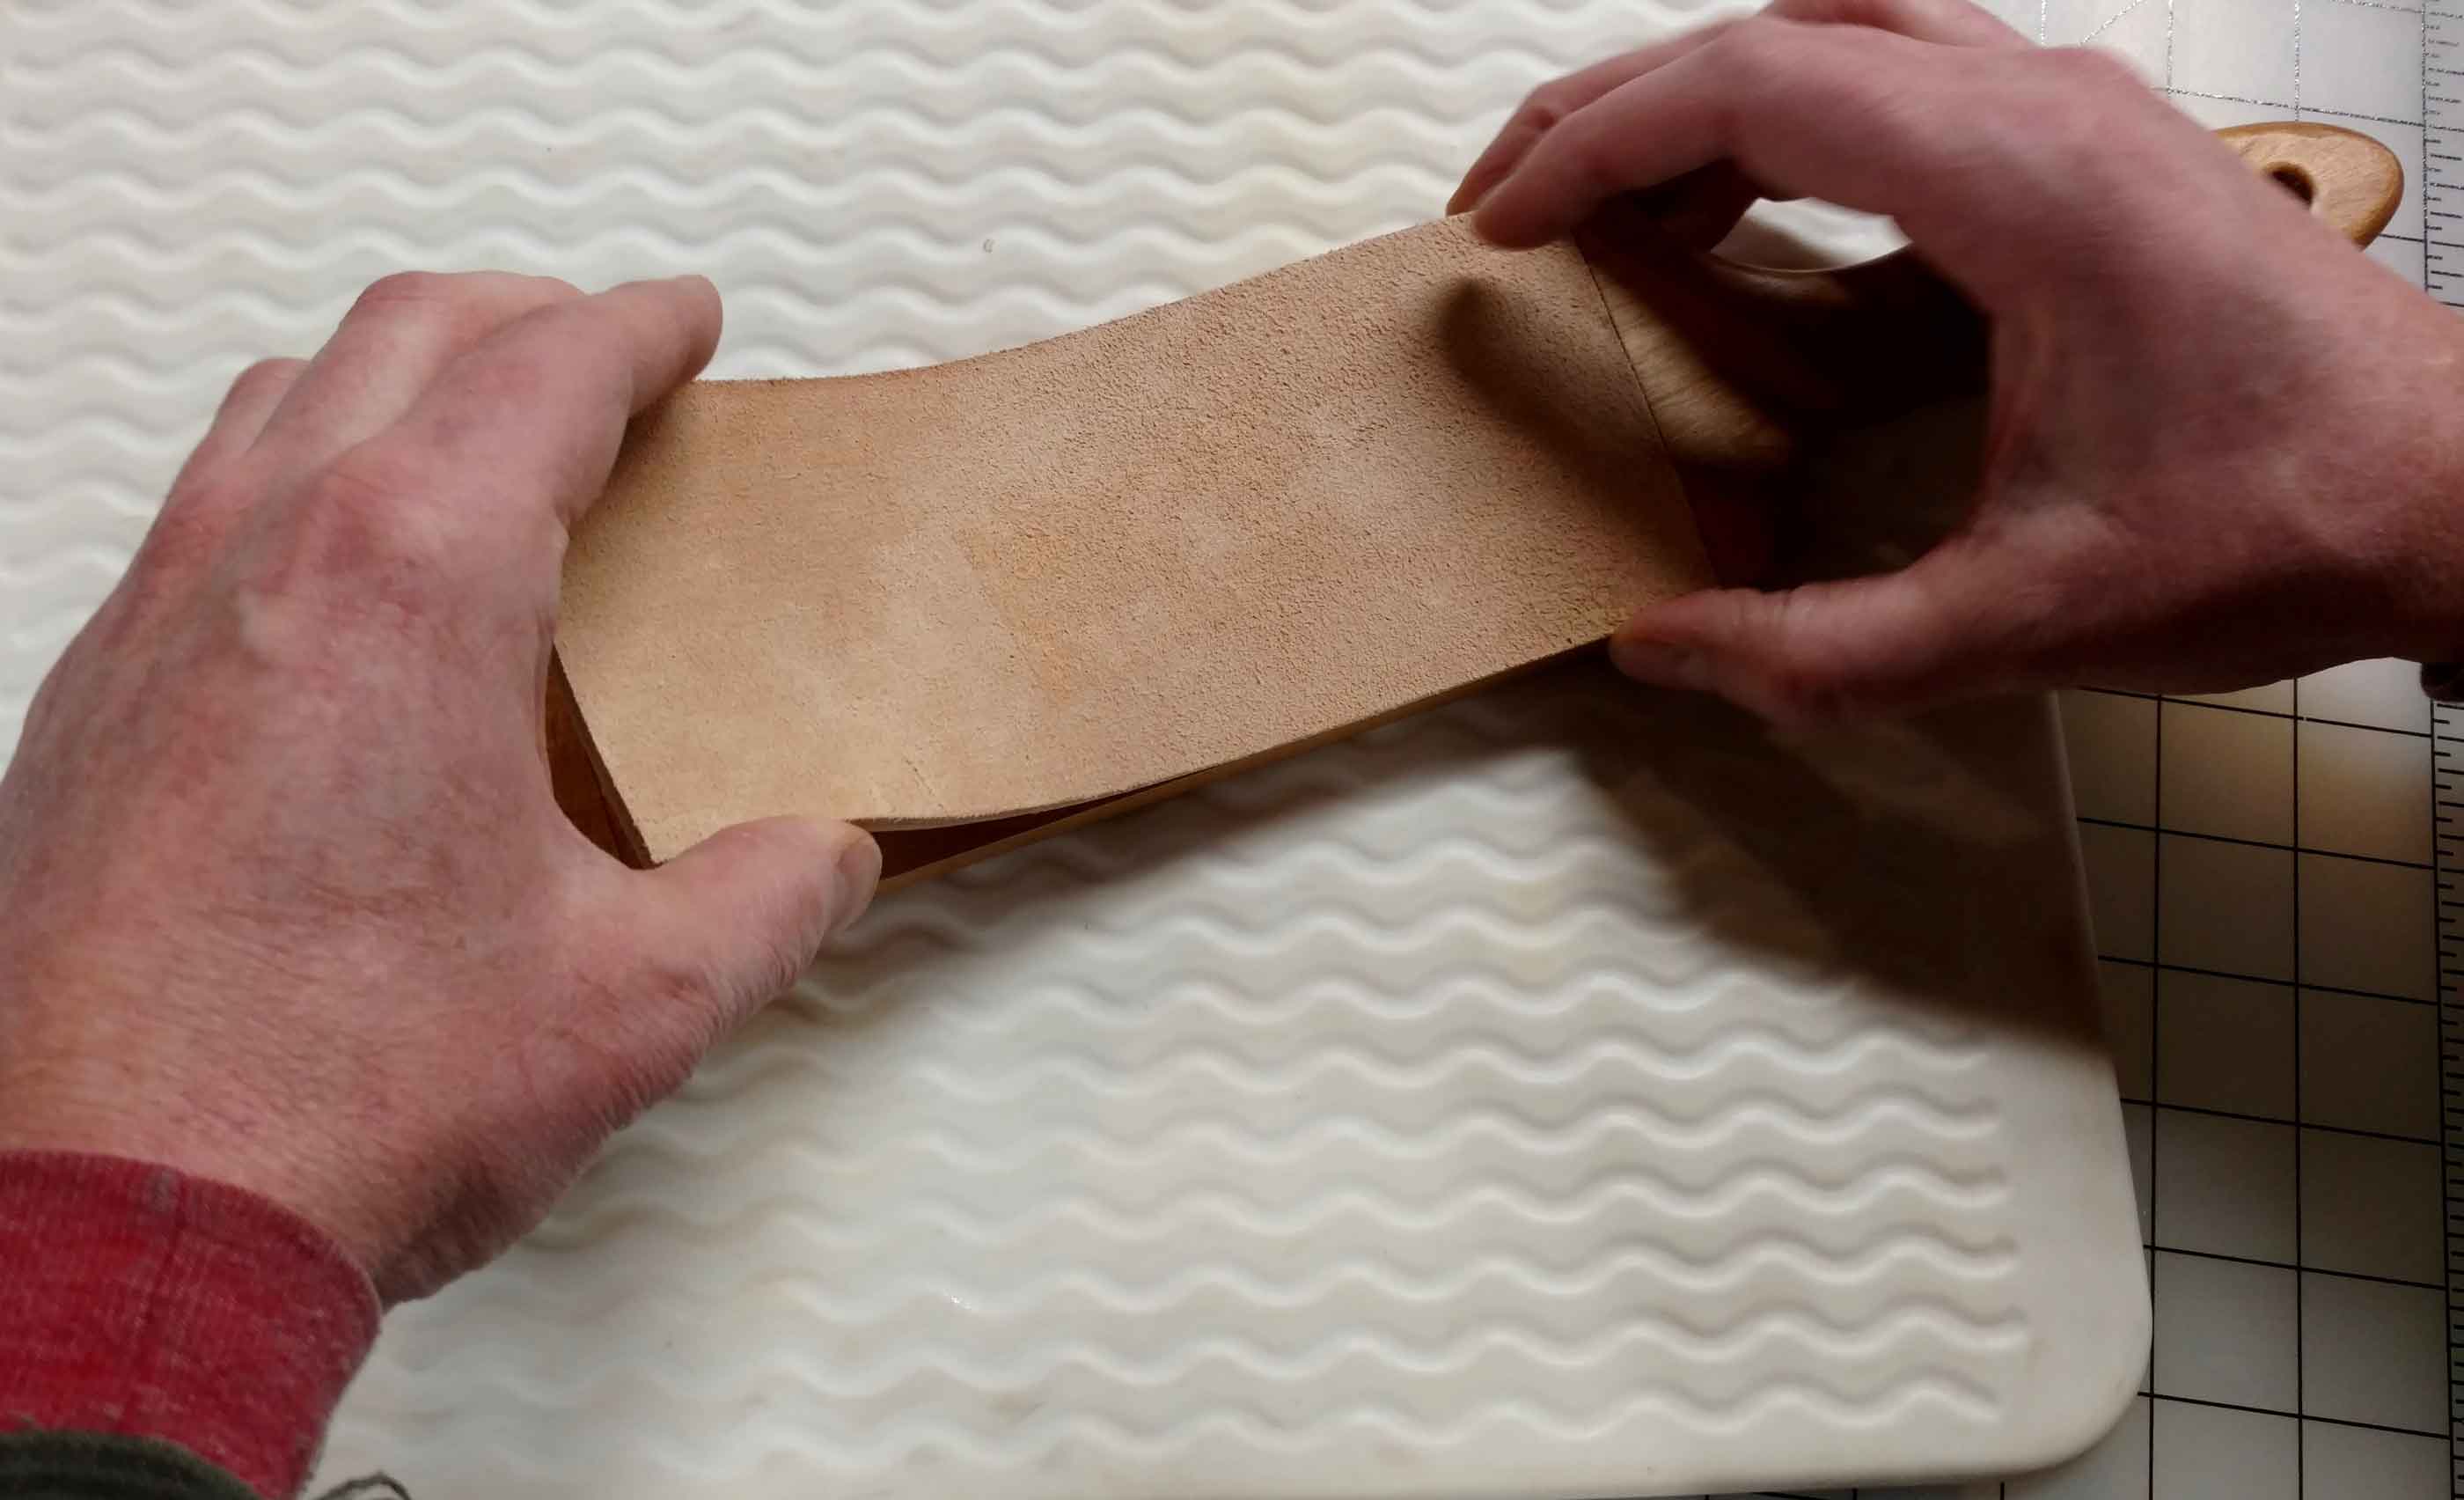
All that was left was trimming the edges, which I did with a sharp utility knife.I did press the strop in a clamp sandwich for an hour or so before I trimmed it, but I do believe that was unnecessary. Now the strop is ready to use! I made this strop with the rough side of the leather up, which makes it so a polishing compound can be applied. I use a green stropping compound, but some like to use yellow compound or jeweler’s rouge.
All said and done, I had a good time making this little project. Enough, in fact, that I plan on making several more and putting them in an Etsy shop. The design will be a little more refined (the first comment my wife made was that the handle looked like a paintbrush handle) and will come in a variety of woods and finishes.
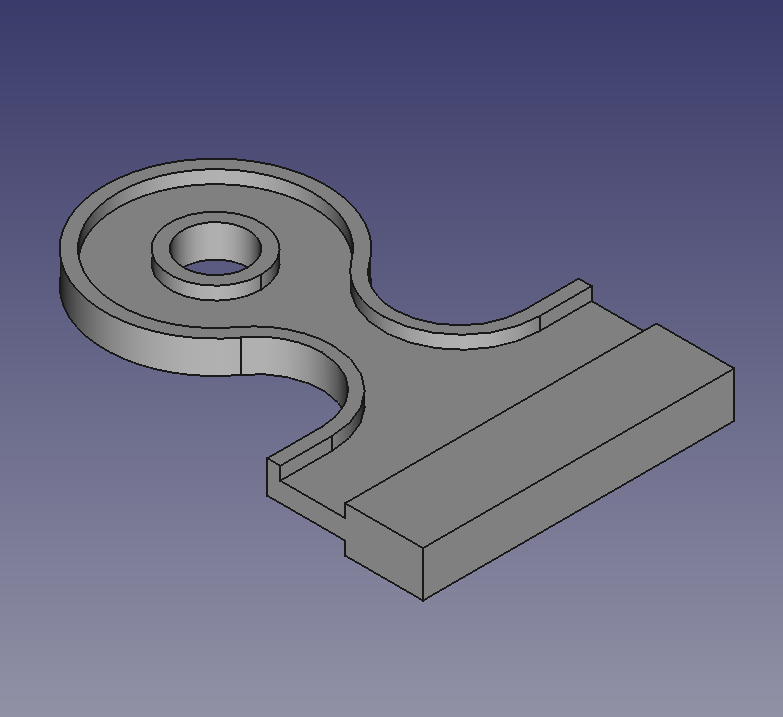
Edit: I did make a few more with a different handle. I had this router jig I designed 3d printed, and it makes a nice handle for sure.