Shaker-Inspired Stepstool
My family stayed at my parents' new house over the holidays, and my 5 year old couldn’t reach the faucet handle in the bathroom. This led to screaming across the house every time she went in there. With other, even smaller grandchildren, I figured that they could use a stepstool as a housewarming gift, and I knew just the one.
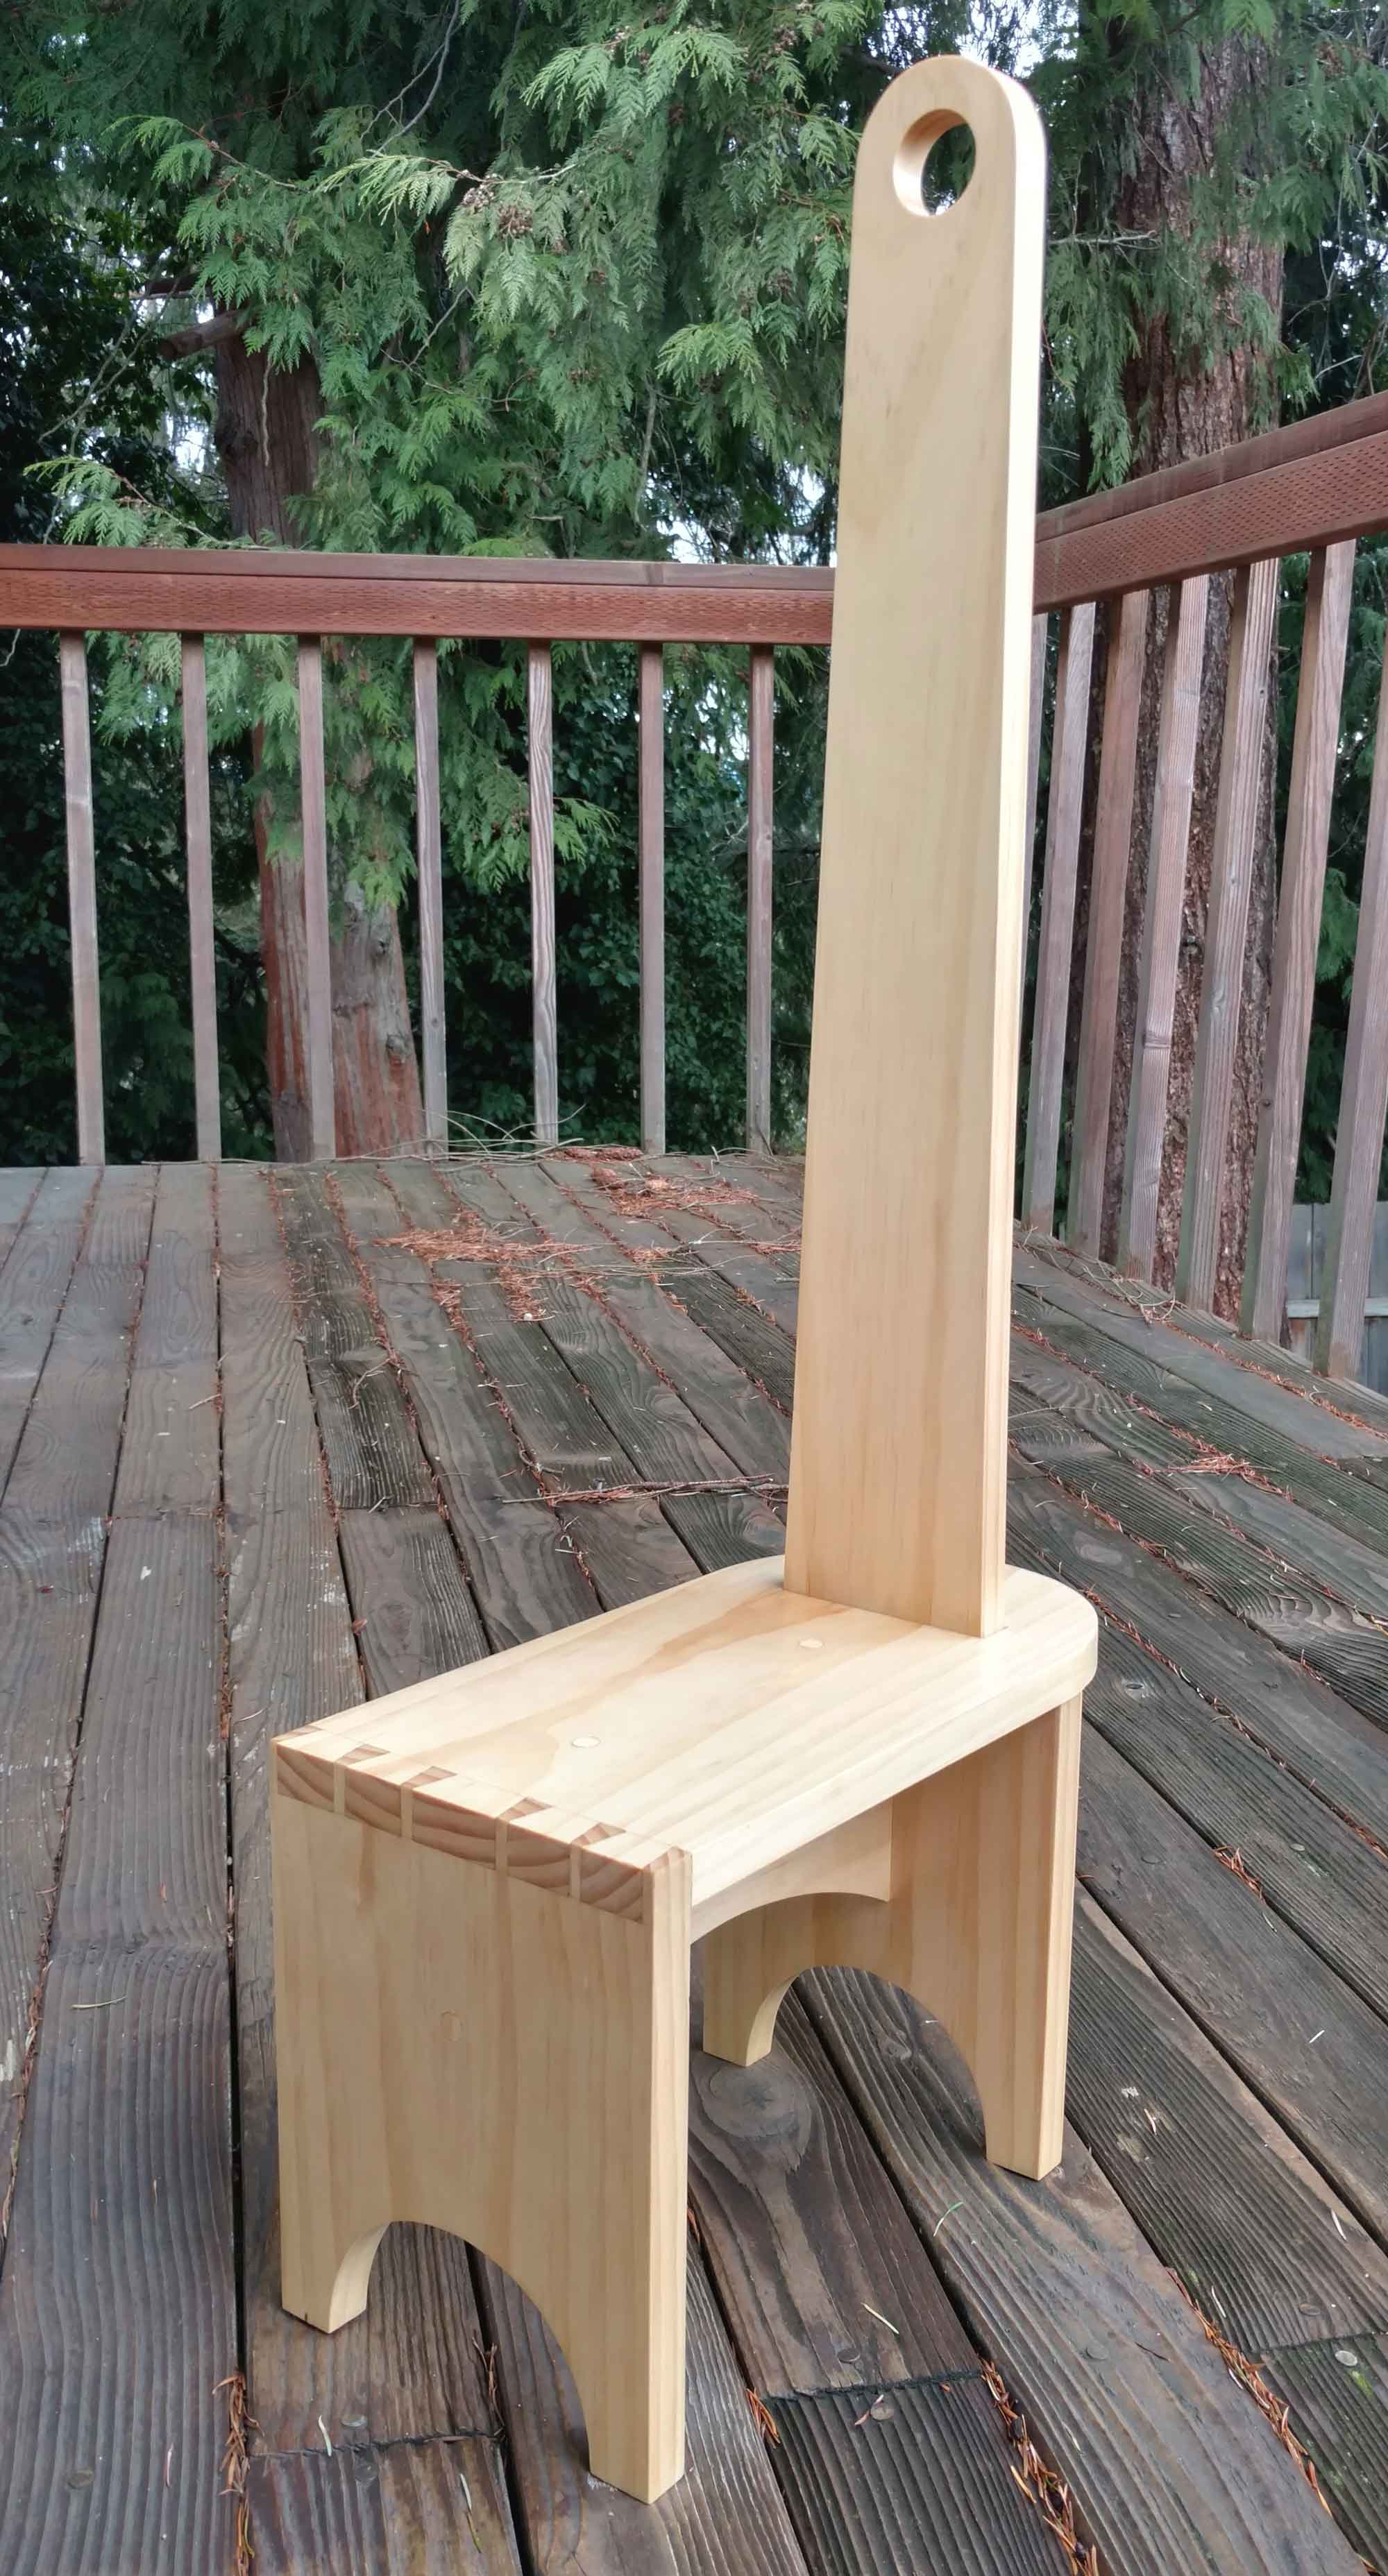
The most recent issue of Fine Woodworking magazine has a stepstool in it that caught my eye. I’m not usually one to build things from plans, but this stool from Christian Becksvoort fit the bill perfectly. I tried to come up with some tweaks to make it my own, but in the end it couldn’t be improved upon, and therefore, I built it as designed.
Choosing the Wood
At first I was planning to build this out of poplar, as I found a not-so-green board that was 6 feet long and 8 inches wide at my local Rockler. I didn’t realize that it was so cupped, though, and once planed, it was just over 1/2" thick. That poplar has been relegated to drawer sides now.
I took a trip to my local Home Depot, and I found a 1x8 Select Pine board, 6 feet long, that was perfectly straight and had nice looking grain. I have never used pine for furniture, but I thought I’d give it a go as it was only $18.
The Build
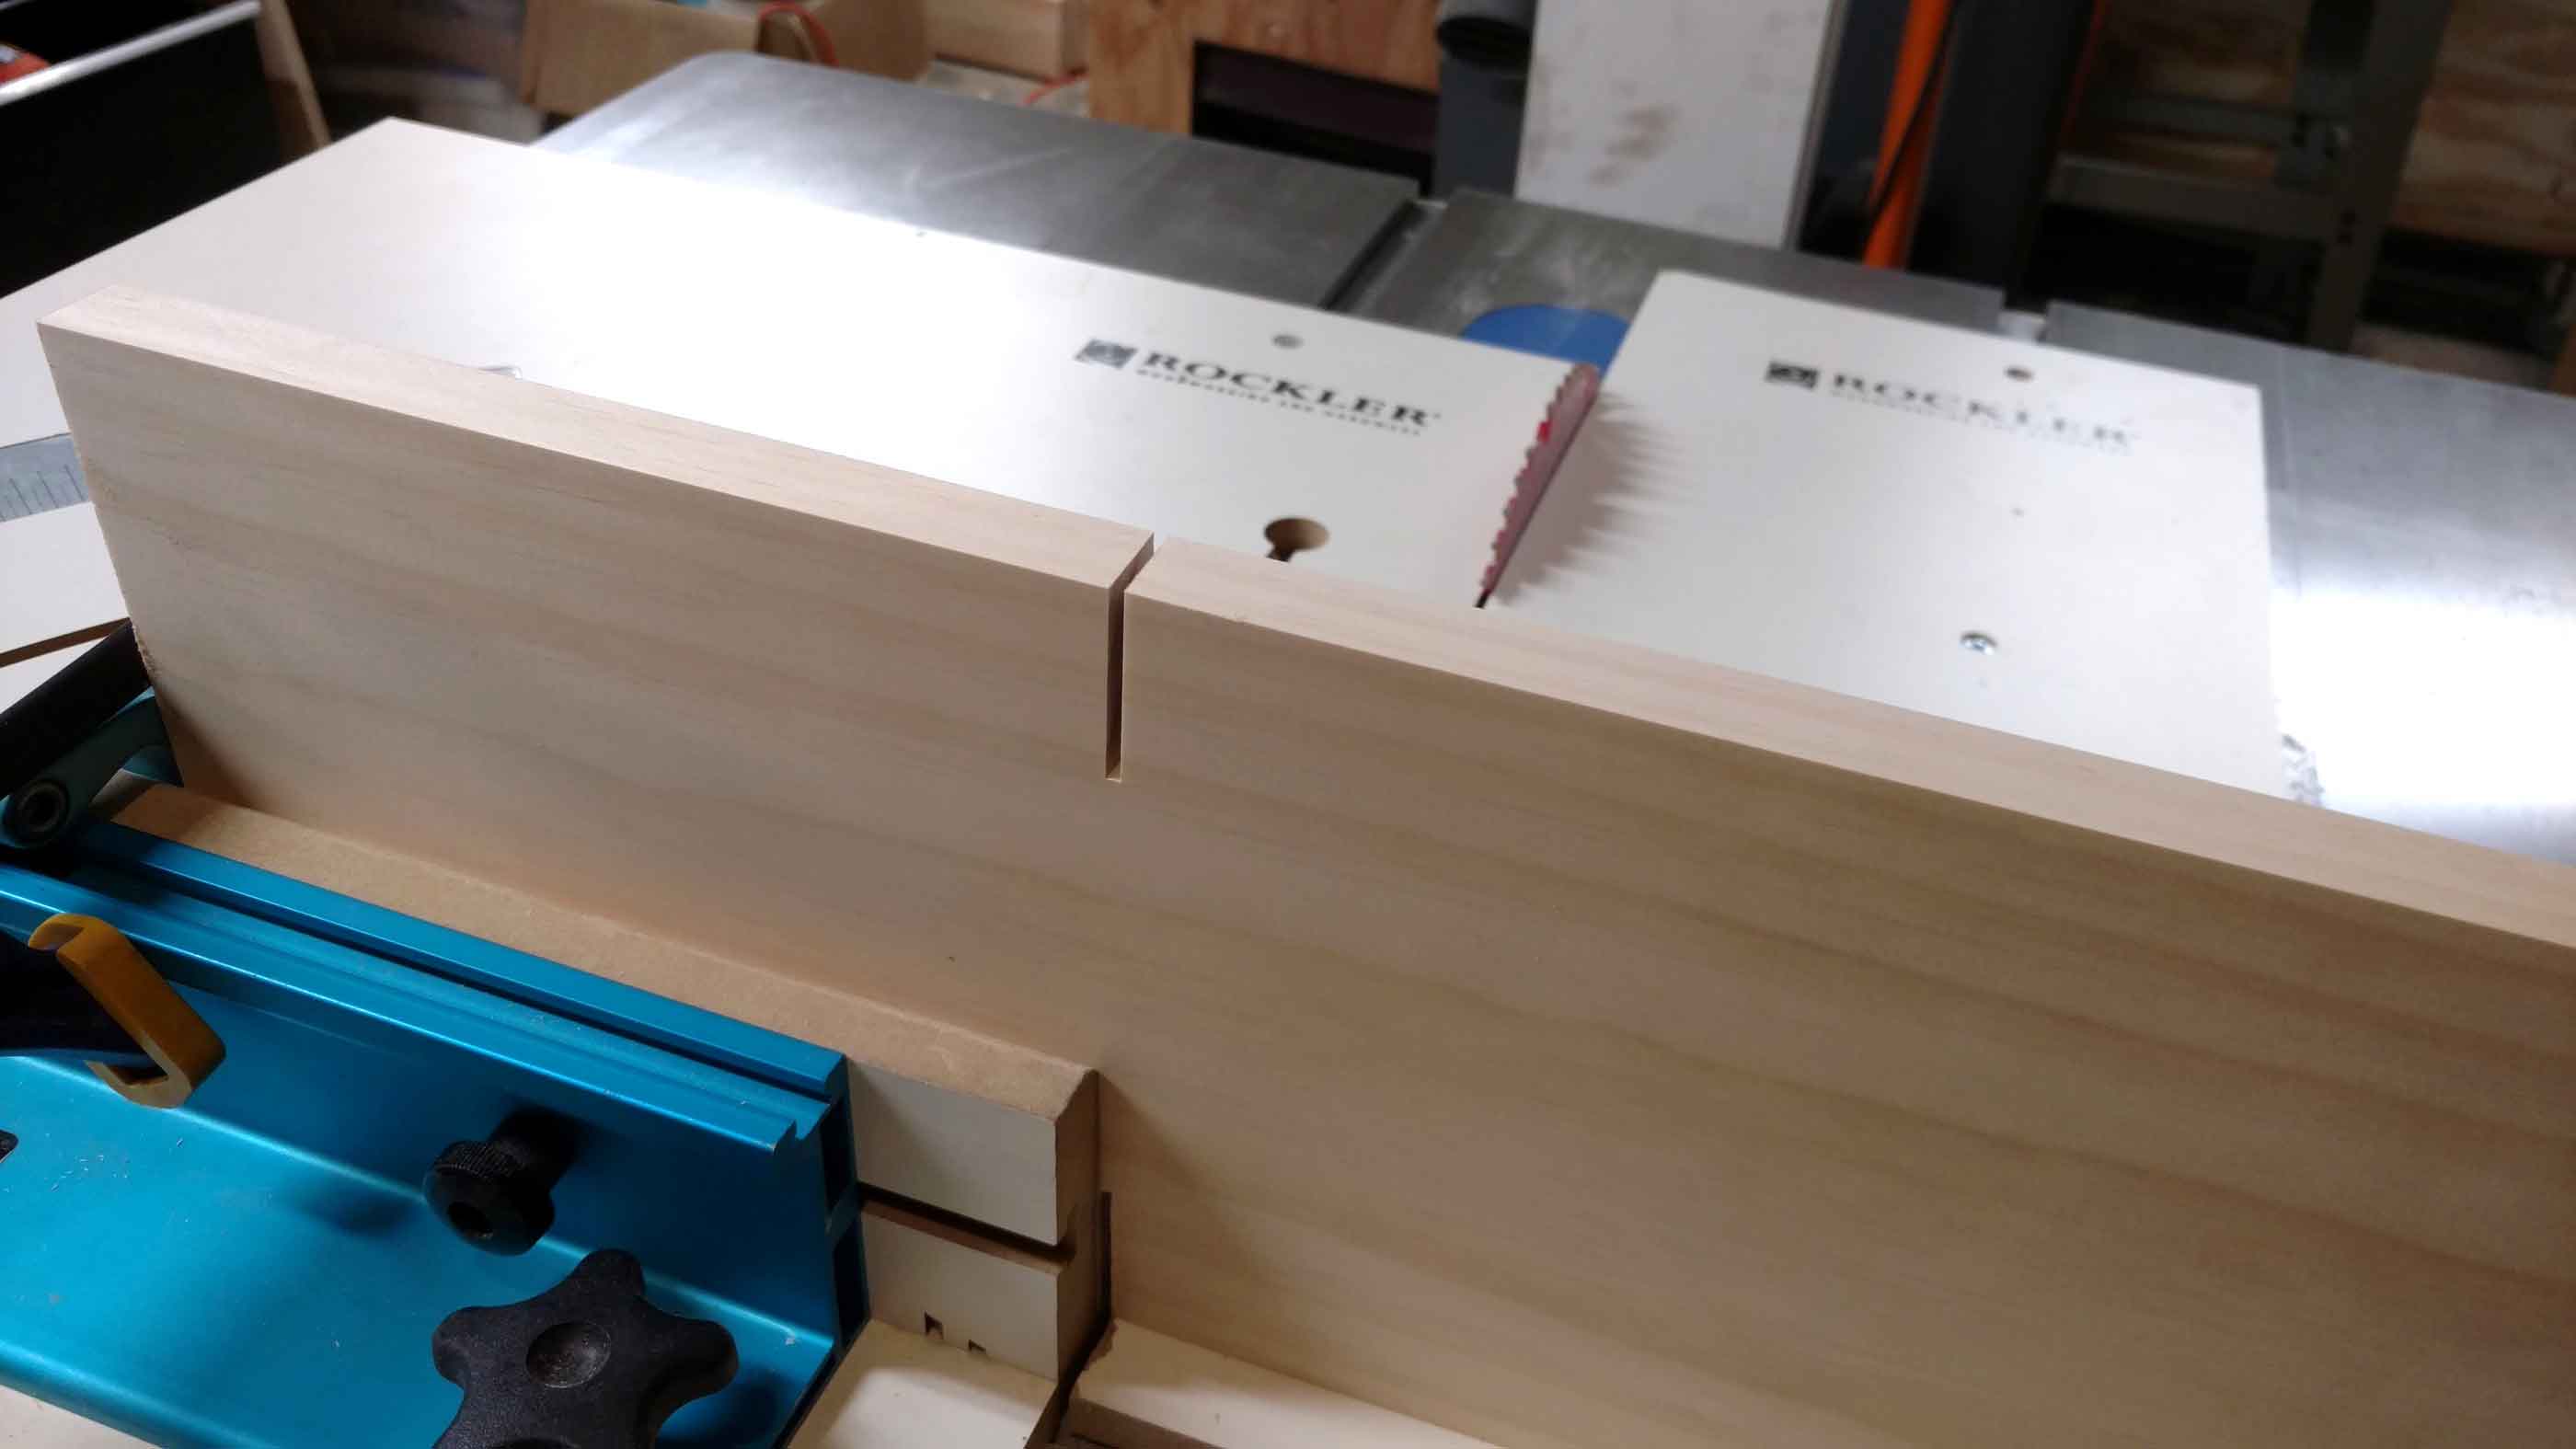
Basically I followed the build plan laid out in the magazine. I started with the back leg/handle, cutting the shoulders on my tablesaw, the tapers and the bottom curve on my bandsaw. I drilled the hole with a forstner bit in my drill press, and smoothed the taper with a block plane. curves were faired on my edge belt/spindle sander.

Cutting the mortise in the top step was much easier that I expected! As I stated earlier, this was the first time I’ve used pine for furniture. I have to say, it’s quite enjoyable because it works so easily. I cut the mortise by hand with nothing more than a chisel in a matter of minutes.
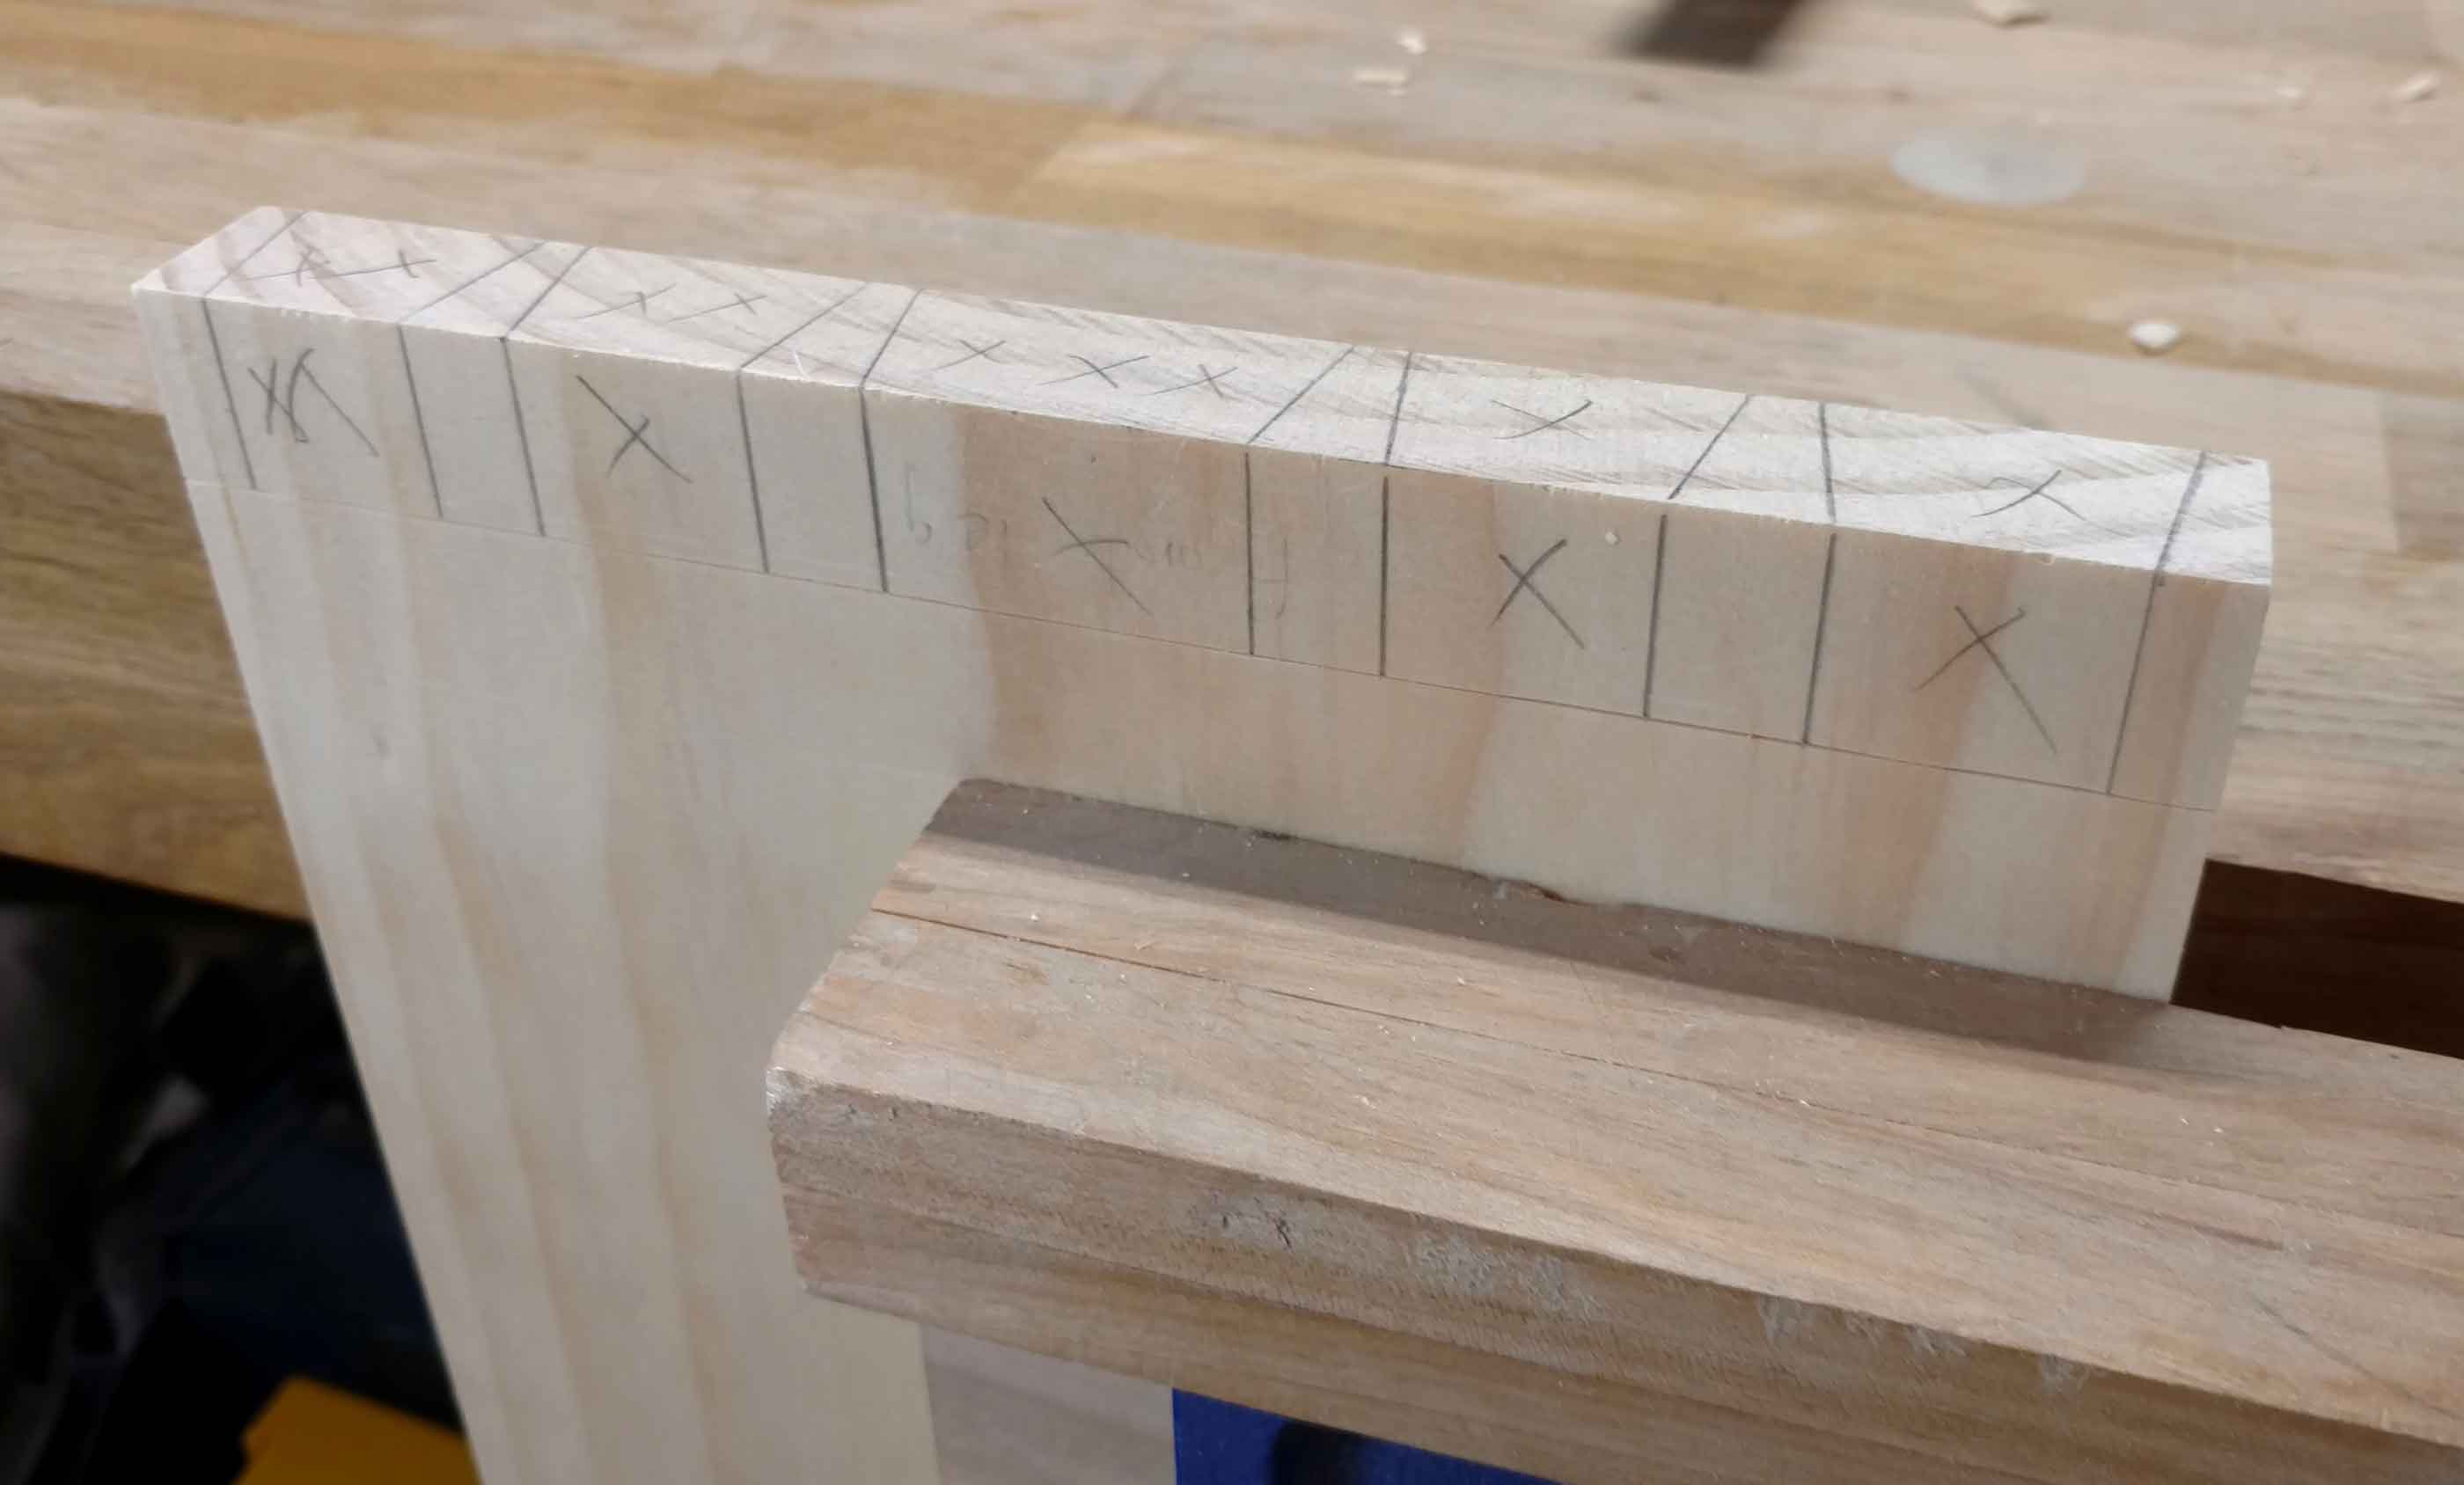
The front dovetail is the foremost detail of the stool, and it came out really nicely. Again, working in pine is great. I set up the pins narrow, and made the center dovetail a little wider than the rest. I cut pins first and tails second. The only glue used in the entire build is in this joint.
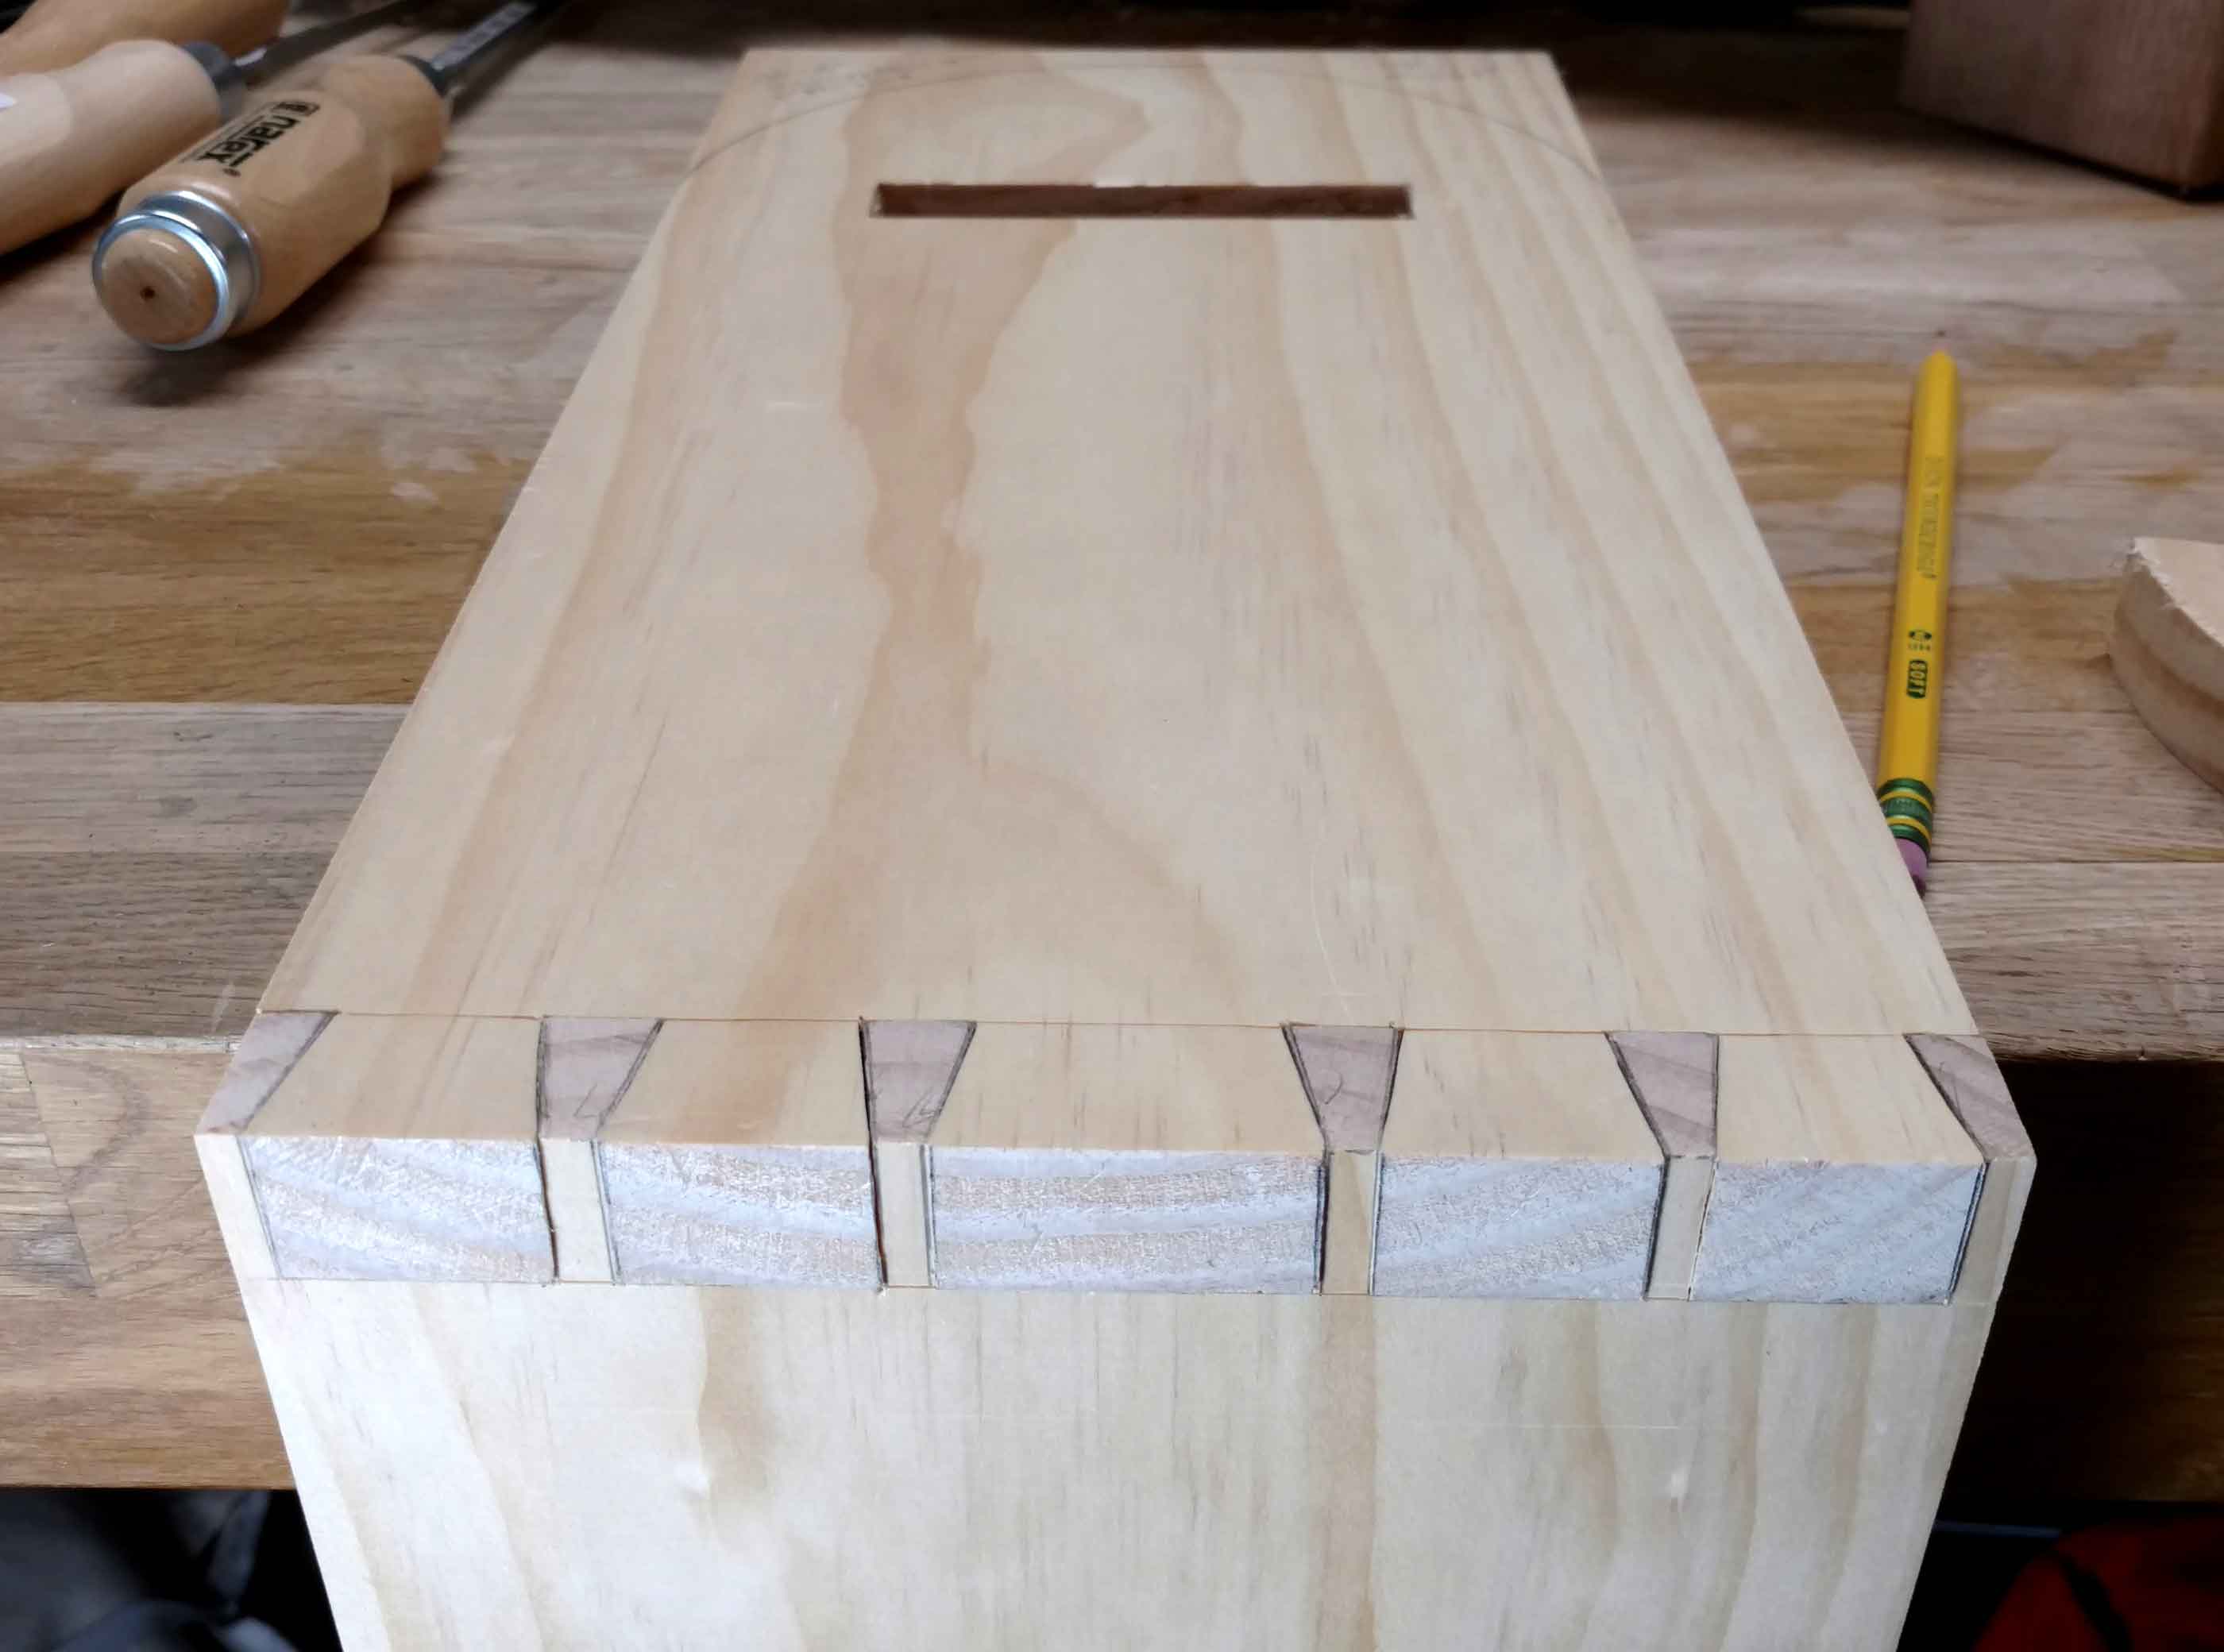
After the front leg is glued and the back leg pushed through the mortise, the final bit of assembly is the center brace. (I did this on stream and didn’t get any pictures in the process.) This is held with screws, and covered with plugs. This is the step that I found to be the most stressful, as drilling pine is a recipe for tearout. And, even though I used a brad-point bit and worked carefully, I still got tearout. I cut my own plugs and matched them carefully, but they still are very visible.
Finishing
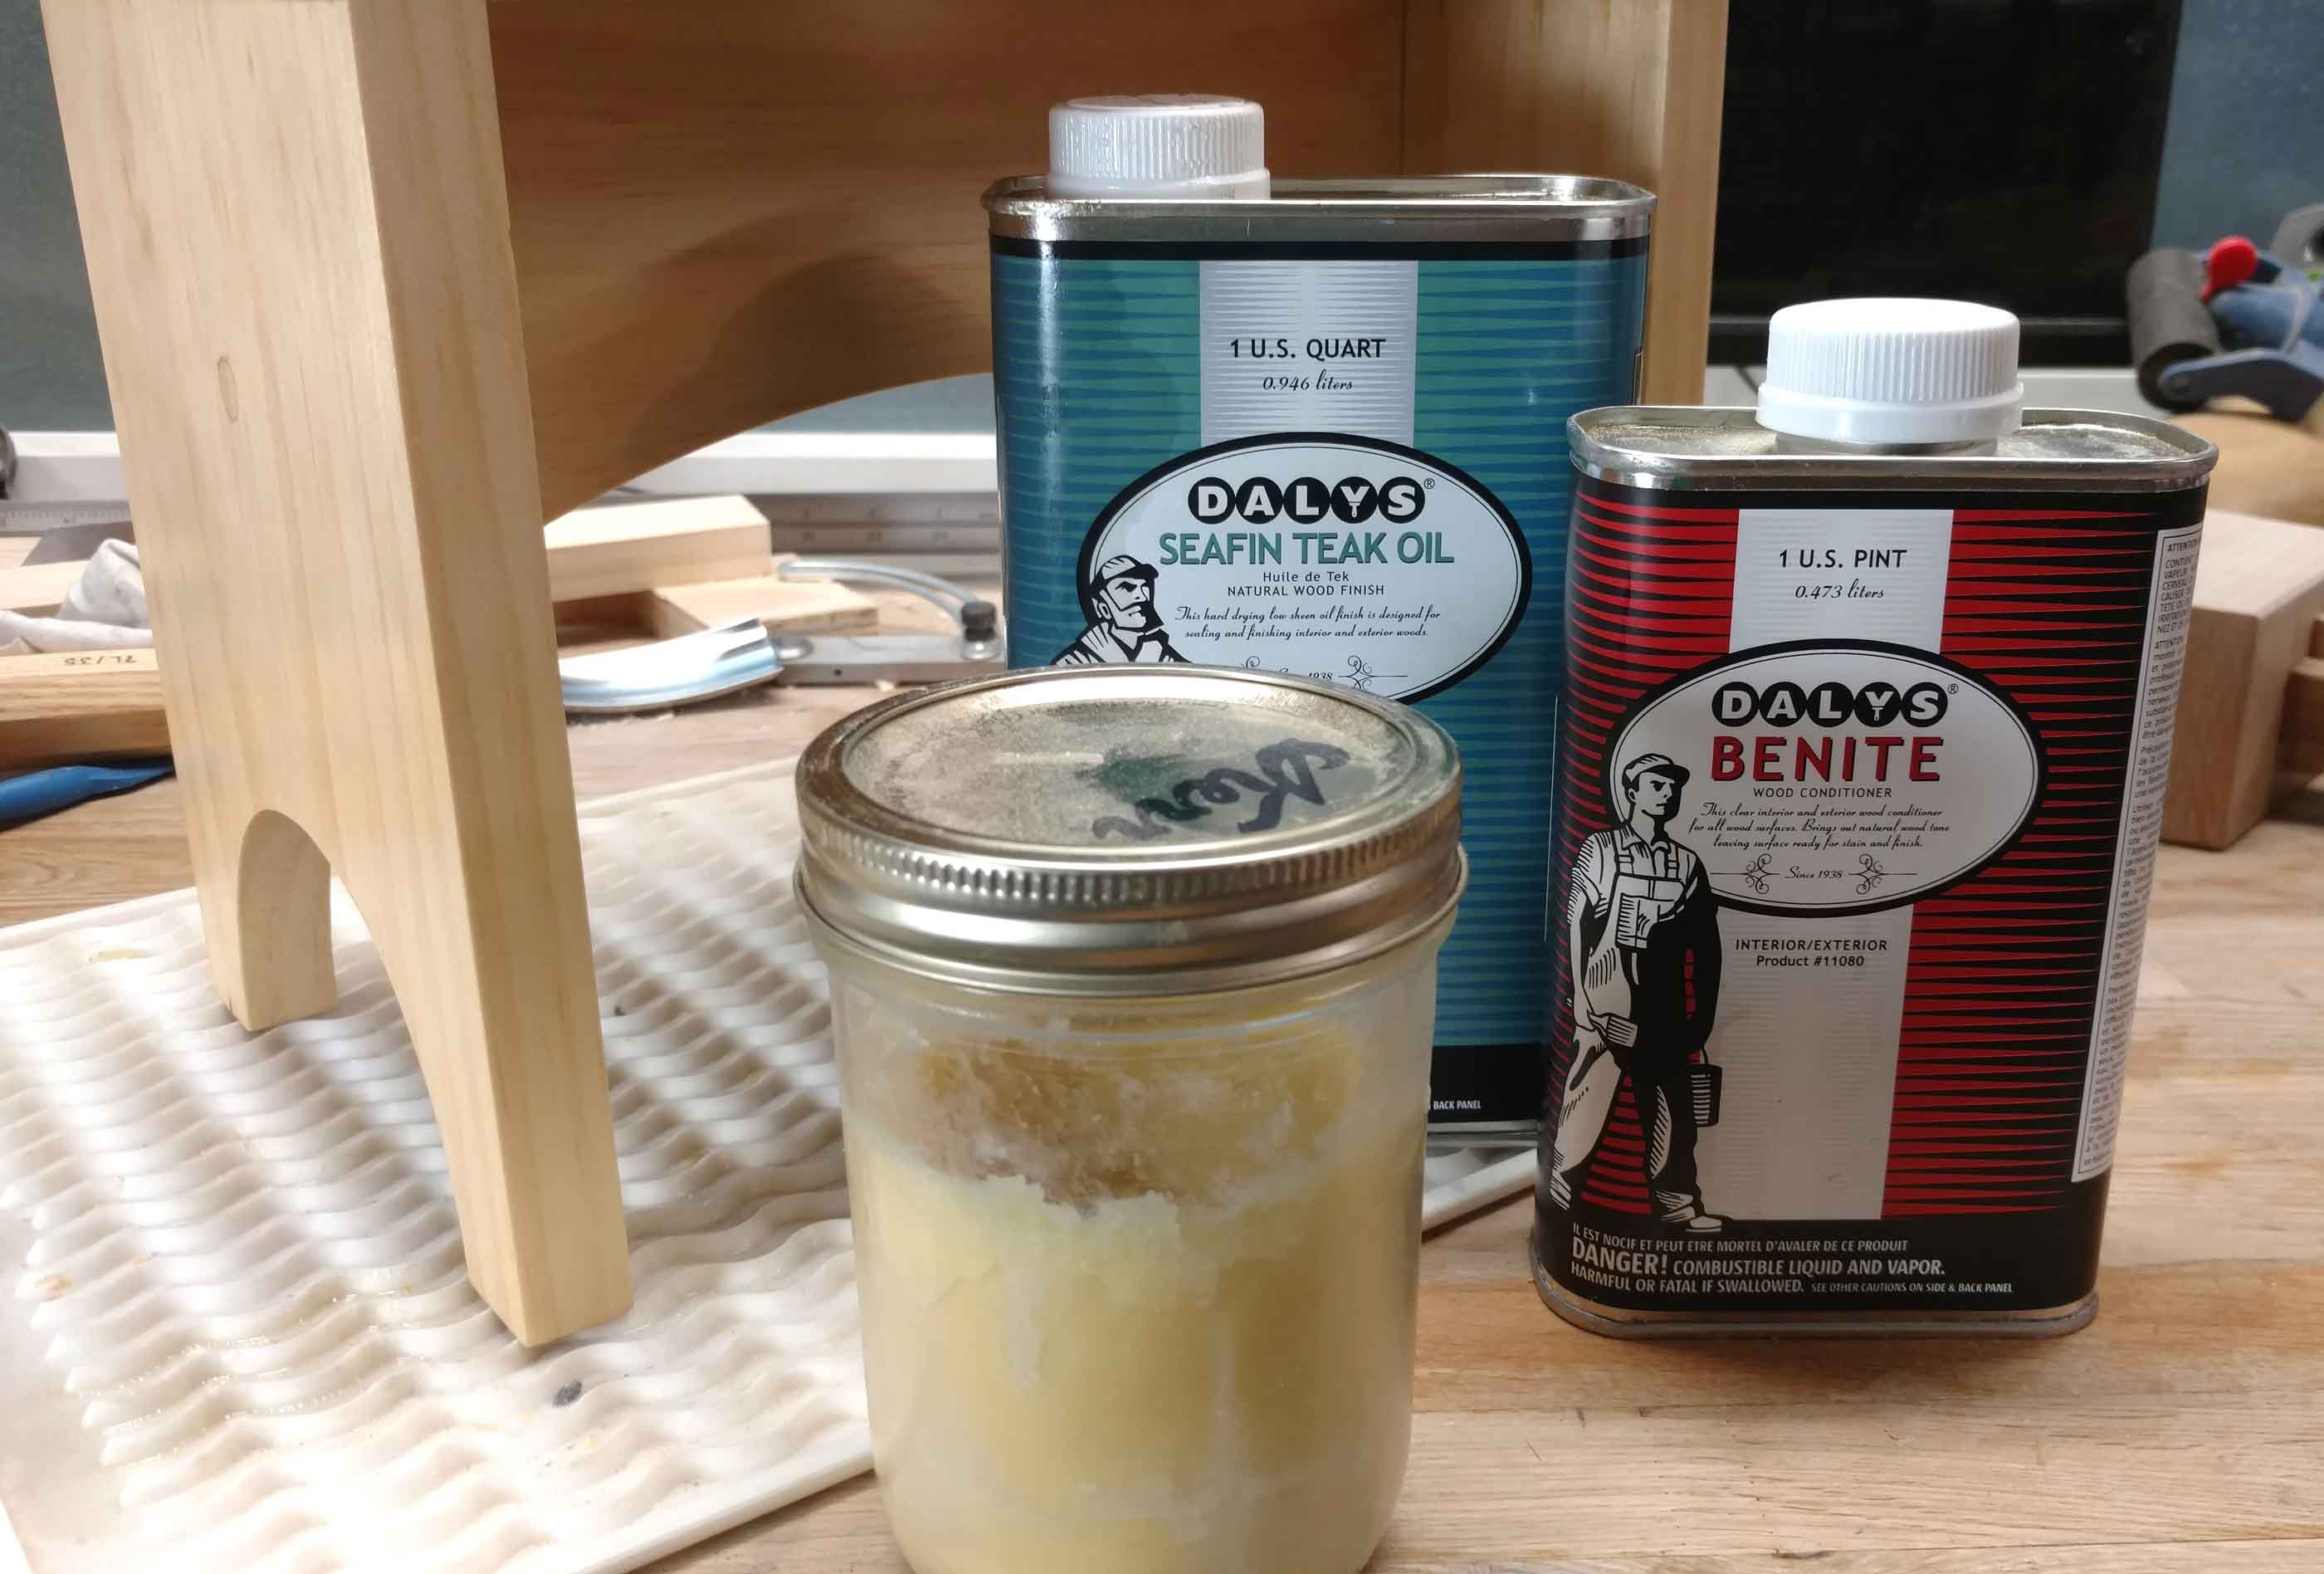
Since I was working with pine, I wanted to have a very durable finish. I decided on Daly’s Seafin Teak Oil, as I had some already from my house’s front entry build. Before I applied teak oil, I applied a coat of Daly’s Benite. This is a wood conditioner that I used on the CVG Fir of my entryway, to protect it before I applied teak oil. It penetrates into the wood and becomes part of the cell structure, strengthening it. It also helps stains to flow more easily. Benite goes on really easily, I just use a wide chip brush and brush on a very wet flood coat. It flows almost like water, and then it dries overnight.
After a light sanding with 220 grit, I applied 4 coats of teak oil. The first 2 coats were wet-sanded after 10-15 minutes with 400 grit sandpaper. The final 2 coats were wiped evenly after 10-15 minutes. Since this was a stepstool, I wanted to make sure that the finish was tough.
Finally I spread on a coat of my homemade paste wax. You can find the recipe on the resource page. This was applied by working the wax into a pad of #0000 steel wool, rubbing it in and then buffing it off with a cotton cloth. This leaves a smooth, durable finish.
Final Thoughts
This was a straightforward build that was fun to do. The build itself took only a few hours, and the finishing was 10 minutes here and there over the course of a few days. It turned out quite beautifully, and I gained a respect for lowly pine. If I build any more of these (which my wife might have me do) I don’t think I’ll do anything differently.
Thanks for reading!